Three Ways Welding Guns and Consumables Can Improve Productivity
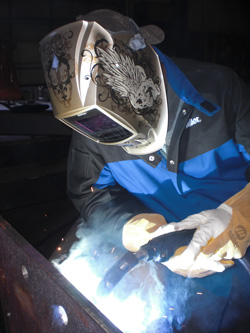
From the power source to the welding wire, each of the components in an arc welding operation can have a significant impact on productivity. The welding gun and consumables — nozzles, contact tips and diffusers — in particular, are often an overlooked aspect of the whole process, but these components directly affect quality, welder comfort, rework, downtime and more.
There are three key ways in which guns and consumables used in flux cored arc welding (FCAW) and gas metal arc welding (GMAW) can lead to improved productivity:
- Gaining better joint access and gas coverage.
- Reducing time spent changing contact tips.
- Increasing arc-on time through improved operator comfort.
Contact Tips
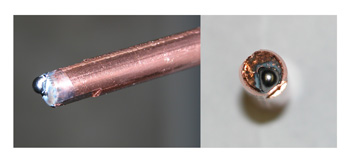
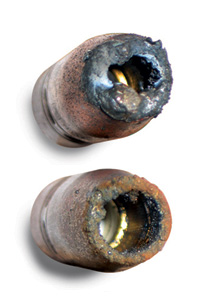
The contact tip is the last point of contact between the welding equipment and the welding wire, as well as the consumable responsible for generating the electrical connection to create the arc. As the wire passes through the contact tip, it can often erode the inside of the tip bore, leading to interruptions in the electrical current and causing poor arc stability. During the normal course of welding, especially at higher amperages, the contact tip can also become loose and cause a burnback (or the formation of a weld inside the contact tip). Burnbacks are often a significant source of downtime in a welding operation — and a big hindrance to productivity.
Having a contact tip that stays securely placed during the course of welding is key to combating burnbacks. Brooklyn Iron Works (Spokane, Wash.) found just such a solution when they converted to Centerfire™ contact tips last year.
Like other structural fabrication companies, Brooklyn Iron Works faces stringent deadlines for its projects, so the ability to minimize downtime for burnbacks and any other equipment management is imperative. Their welding personnel run their weld beads at high amperages (300 to 400 amps) using typically .052- or 1/16-inch FCAW wire diameters, which often proved too harsh on their previous contact tips. They would loosen after routine welding, causing the wires to arc back and create the burnback.
“Before we converted to the new contact tips, we had a substantial amount of downtime for contact tip changeover,” explains QA Manager, Phil Zammit. “And that’s money. It’s lost arc time for tip maintenance. Now we are using a third fewer tips and don’t have to worry about the downtime like before.”
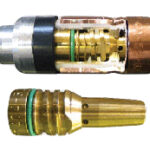
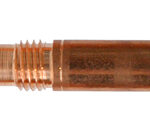
The company’s new contact tips don’t loosen because they “drop in” the diffuser and are locked in place by tightening the nozzle. They also feature a non-threaded tip design with a tapered base and large diameter seat. The other benefit of the design is that it helps generate consistent electrical conductivity and heat transfer, both of which help the consumables last longer and perform more reliably.
Better Shielding
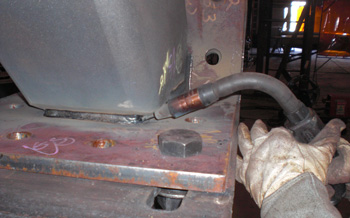
Brooklyn Iron Works’ welding operators frequently encounter weld joints up to 2-in. deep. In the past, they often had to extend their electrode stickout as far as 2 inches to access the joints, a practice that risked generating porosity since it could compromise the necessary shielding gas coverage.
In addition to inadequate shielding gas, porosity can also occur if a welding operator uses too small of a nozzle for the application, extends the welding wire too far beyond the end of the nozzle or tries to weld with a nozzle full of spatter. Air from outside or from fans can create the problem, too, by blowing away much needed shielding gas.
Brooklyn Iron Works has found their solution to porosity is to have the right size and shape of nozzle for the application. Switching to Centerfire consumables now allows them to reduce electrode stick-out and gain better gas coverage at the same time.
“These consumables direct the gas exactly where we need it,” Zammit explains. “It keeps our gas shielding coverage right at the weld, even when the doors are open or we have a breeze. We’ve never had a huge problem with porosity, but now we have even less of one.”
The nozzles feature a tapered shape that stays fixed flush with the contact tip. They also include a built-in spatter shield that acts as an additional gas diffuser and ensures a more consistent directional gas flow, even on deep joints or if there is a slight breeze present.
The Benefits of Comfort
The typical welding operator spends time during a shift allocated to joint preparation, part fit-up and movement, along with other activities that contribute to the throughput of the welding operation. But during the actual process of welding, it is critical that he or she remain comfortable. Good welding operator comfort lessens the chances of injuries associated with repetitive movement and reduces overall operator fatigue. And a more content employee also brings forth the potential for greater productivity.
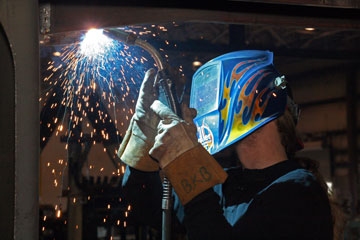
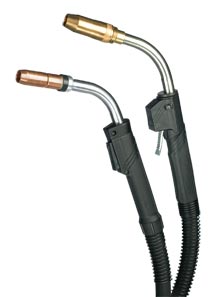
Welding operators at Brooklyn Iron Works have addressed the issue of comfort through the various necks available on their Bernard 400-amp Q-Guns. The Q-Guns are available with fixed, rotatable and flexible necks in various lengths and bend angles. These neck options help the welding operators better accommodate the varying welding angles they encounter on projects. They can reach the weld joints better and minimize downtime to address issues like wrist fatigue. The flexible necks are especially helpful on difficult joints, as they can be adjusted to weld around corners or to fit into complex shaped steel components.
Welding operator Ricky Curtis explains, “I can bend the neck in any direction I need. Even around the corners. I like that the gun does the work for me, instead of my wrist.”
According to the company’s maintenance supervisor, John Dahl, there have been additional benefits to the design of the gun as well.
“It takes only about five minutes to change a neck on these guns, compared to nearly an hour with our previous guns,” he explains.
This ease of maintenance is another way in which having the equipment has helped Brooklyn Iron Works reduce downtime and get back to welding faster.
Remember, in the long run, companies can benefit from looking at how every aspect of their welding operation impacts downtime. Time spent for changing out contact tips or maneuvering unnecessarily into difficult joints can ultimately hinder productivity, as can having welding guns that are time-consuming to maintain. Addressing the problem of productivity may be as simple as looking at a new consumable option or finding ways to make the welding operators more comfortable.
Consumables for the welding gun can significantly impact the productivity and welding quality in an operation. This makes it important to keep consumables properly cleaned and maintained, to help minimize unplanned downtime, extend consumable life and optimize performance. The heat produced in the welding process can have a significant impact on the cleanliness and longevity of MIG consumables. Processes like pulsed MIG and/or higher amperage applications tend to subject consumables to higher levels of heat, as do applications in which there is a large amount of reflective heat. Those include applications with tight tooling or those that require welding in restricted areas. The hotter the consumables become during the welding process, the softer the material (usually copper or brass) becomes, resulting in a surface area that is much more prone to accumulating spatter and failing prematurely. To avoid such problems, it is important to determine the best consumables for each application and consider how they will be managed throughout the course of a welding shift. For example, high-amperage applications (those above 300 amps) most often benefit from using heavy-duty consumables because they have greater mass and are capable of dissipating the heat more readily. However, if the welding procedure dictates that the contact tip must be changed frequently, a standard-duty contact tip may suffice. The goal is for companies to determine which consumables — heavy- or standard-duty — are most capable of withstanding the duty cycle and heat of the application. A reliable welding integrator can often help with the selection. Using an anti-spatter compound can help keep MIG consumables clean on both semi-automatic and robotic welding applications; however, it must be used sparingly. On a semi-automatic application, welding operators should dip only the front inch and a half of the nozzle into the anti-spatter compound. Submerging the nozzle in the anti-spatter compound can saturate the nozzle’s fiberglass insulator and also potentially plug up the gas holes on the diffuser. This build-up may cause the nozzle to fail prematurely or result in porosity in the welds due to the unbalanced gas coverage. In robotic applications, only the minimum amount of anti-spatter compound required for the application should be used. Using too much can cause build-up on the consumables and/or cause debris to accumulate and clog the nozzle, leading to poor gas coverage, inconsistent electrical conductivity or shortened consumable life. Another important way to combat spatter is to inspect the nozzle for build-up on a regular basis and clean it with a soft wire brush or spatter-cleaning tool as needed. Welding operators should never hit the nozzle against the tooling or work piece to loosen spatter. Doing so can dent, misshape or compromise the smooth surface finish of the nozzle, which creates greater areas for spatter to adhere to and reduces the life of the consumable. Always keep MIG consumables in their original packaging until they are ready for use. Opening them and placing them in a bin can lead to scratches or dents that allow spatter to adhere and will ultimately shorten the products’ life. Similarly, removing contact tips or diffusers from their packaging and storing them in open or dirty containers can cause dirt and oil to accumulate in the threads, which can impede them from properly seating together. Also, companies should always keep storage containers for new consumables separate from those for discarded ones to avoid selecting an old contact tip or nozzle that may have dents or scratches and be prone to spatter accumulation. Finally, welding operators should always use clean gloves when handling or replacing contact tips, nozzles and diffusers to prevent dirt, oil or other contaminants from adhering to them. Installing MIG consumables correctly and inspecting them periodically for good connections minimizes the chance of poor conductivity and with it, spatter accumulation or premature failure. Welding operators should always follow the GMAW consumable manufacturer’s suggestions for contact tip and gas diffuser installation, using a pair of channel lock pliers, welpers or other such recommended installation tool. Never use wire cutters or side cutters — too much pressure from these tools can damage the inside diameter of the contact tip, which leads to poor welding performance and a shortened lifespan. Also these tools tend to scratch the surface of the consumables leaving marks that attract spatter. A good rule of thumb is to hand tighten the contact tip until it is fully seated into the diffuser, then grip the contact tip with an appropriate tool as close to the base as possible, tightening it 1/4 to 1/2 turn past finger tight. This procedure helps ensure a good connection that minimizes electrical resistance, overheating and damage to the consumables, as well as excessive spatter accumulation. Follow the same procedure for installing and tightening the diffuser so that it fully connects with the neck. Also note, some contact tips available in the marketplace can be installed and held in place by hand tightening the nozzle. Check the manufacturer’s recommendation for proper installation instructions. Inspect consumable connections regularly to ensure that they are secure. An improperly trimmed and installed liner can cause a host of wire-feeding problems that lead to downtime to rectify. It can also affect the performance of MIG consumables, how clean they stay and their longevity. Cutting a liner too short can cause the liner to be misaligned with or in the gas diffuser. The result is a welding wire that feeds off-center, leading to premature contact tip failure. Liners that are too short can also lead to the build-up of debris between the liner and retaining head, which causes wire feeding issues and poor weld quality. In some cases, the gap that is present between the gas diffuser and liner when a liner has been cut too short may cause the welding wire to catch, resulting in small shavings that can plug up the contact tip and cause it to fail quickly. A liner that’s too long can cause kinking that again leads to wire-feeding issues that shorten the life of the contact tip. Always make sure that to remove any burrs or sharp edges after cutting a liner to ensure smooth and consistent feeding of the welding wire. Welding operators should always consult with the liner manufacturer’s recommendation for proper trimming and installation instructions. It is also important that they wear gloves when handling the liner and avoid dragging it on the ground to prevent debris from being introduced into the MIG gun. Such debris can lead to weld contamination and/or poor consumable performance. The position of the contact tip (extended or recessed) affects how well consumables last, along with how clean they stay. So too does the nozzle used in conjunction with a specific contact tip and the wire size. The farther the contact tip extends from the nozzle, the closer it is to the arc and the more prone it is to reflective heat. The result is a greater tendency toward spatter accumulation and a greater opportunity for burnbacks. Using a recessed contact-tip-to-nozzle relationship when possible can minimize this problem and provide better shielding gas coverage at the same time. For companies with applications that require access into restricted areas, it is important to select a nozzle that provides that access, but isn’t tapered so much that it minimizes the space around the contact tip. If there isn’t enough space for shielding gas to flow out of the nozzle, it can cause the shielding gas to hit the work piece and begin jetting back and/or swirling. The result is the pulling of oxygen into the weld pool and an increase in spatter. Too, the smaller the bore size on the nozzle, the more prone it is to absorbing heat (because there is less mass to that portion of the consumable) and having spatter adhere to it. As a general rule, companies should select the largest consumable that will work for the application and provide the necessary joint access. Larger consumables are more able to resist heat and spatter build-up, and they often last longer as a result. Selecting consumables with the right material for the application is important, too. For example, brass nozzles tend to resist spatter well and are good for lower-amperage applications (100 to 300 amps), whereas copper nozzles are better for high-amperage applications (above 300 amps) or for those with longer arc-on time. Lastly, companies should always pay attention to the manner in which they manage consumables. When possible, having the same consumables throughout the welding operation can help welding operators better maintain the consistency of the consumable performance and troubleshoot problems more quickly when they occur. The result can be longer-lasting, cleaner consumables that provide more reliable performance and quality.
Gas metal arc welding (GMAW) involves more than just arc-on time. Welding operators also need to be mindful of other activities that contribute to the overall productivity and quality in the welding operation, including proper joint preparation, following correct weld parameters and ensuring good part fit-up. Selecting the proper GMAW gun, consumables and shielding gas is also critical to achieving good results. Unfortunately, it is not uncommon for there to be confusion as to how these components affect the welding operation. The reality is, however, that they can have a significant impact on downtime and costs, not to mention operator comfort. The goal is to make sure that impact is positive. Following are answers to some common questions about GMAW guns, consumables and shielding gas to help you select the best ones for your welding operation and manage them in a way that provides optimal results. When it comes to GMAW guns, bigger isn’t always better. In fact, selecting a larger amperage gun than needed for your application may cost you money in the long run and lead to discomfort, which results in unnecessary downtime. Duty cycle is defined as the amount of arc-on time within a 10-minute period, so a 20 percent duty cycle would constitute two minutes of arc-on time in a 10-minute time frame. Because most welding operators don’t weld 100 percent of the time, it is often possible to use a lower amperage gun for a welding procedure that calls for a higher amperage one. For example, in many cases you could use a 300-amp gun model in place of a 400-amp gun model, since actual arc-on time often does not exceed the amperage to duty cycle ratio of a 300-amp gun. The benefit is that the lower amperage gun generally costs less money — and it also weighs less, which can help reduce wrist fatigue, commonly associated with downtime. The lower amperage GMAW gun will still be capable of operating at the appropriate capacity, while also offering the benefit of being easier to maneuver – a factor than may help you improve weld quality and lessen rework, too. There are several factors to consider when choosing your GMAW gun. After determining your amperage needs, you should also look for features like a rigid, strong strain relief. Strength in this area between the power pin and cable can help minimize kinking, which often leads to an unstable arc and/or poor wire feeding. Next, consider selecting a smaller handle gun (but one that can still meet your amperage needs), as it may help reduce wrist fatigue and be easier to maneuver into complex joints. You may also want to consider looking for a specific style of neck for your application. Many GMAW gun manufacturers offer fixed, rotating and flexible necks in various lengths and angles, allowing you to reach joints more easily. Regardless of the style of neck you choose, you should find one with good armor to protect it against damage that could lead to electrical shorts or premature failure. Finally, select a GMAW gun with a comfortable and easy-to-service trigger. Typically, you will be able to find a variety of trigger options, including standard style, locking or dual schedule. Regardless of the specific style, look for sturdy triggers that will withstand work site abuse and that can be easily replaced should one of the mechanics fail. Shielding gas prevents exposure of the molten weld pool to oxygen, nitrogen and hydrogen contained in the air atmosphere, in order to protect the weld from contamination and/or defects. The type you use can impact everything from the penetration profile to arc stability and the mechanical properties of the finished weld. If you need deep weld penetration, particularly on thick materials, carbon dioxide (CO2) is a good choice and it is also the least expensive. This gas, however, does tend to create spatter and is limited to use in short circuit welding. Adding 75 to 95 percent argon to the CO2 can provide better arc stability and puddle control, both of which reduce spatter compared to straight CO2. This mixture will also allow you to use a spray transfer process, allowing you to weld faster in many cases. Argon also produces a narrower penetration profile that is useful for fillet and butt welds. If you’re welding a non-ferrous metal — aluminum, magnesium or titanium — you’ll need to use 100 percent argon. In some cases, oxygen or helium is used in the GMAW process, but it is not as common. Consumable service life can vary dramatically from application to application. There are a few steps you can take to make them last longer, however. First, use the correct contact tip for the size wire who have and be certain it fits securely with the gas diffuser. A solid connection between these components helps ensure good conductivity and minimize overheating, making them last longer. Also, inspect your nozzle on a regular basis for spatter and clean as necessary. Use a pair of welding pliers or a special nozzle-cleaning tool for the job, as directed by the consumable manufacturer. Be sure, too, that you have the appropriate type of consumables for your application. Applications above 300 amps, for instance, can often benefit from heavy-duty consumables, which have greater mass and can dissipate heat more readily. The result, in many cases, is longer service life. Finally, set the drive roll tension on your wire feeder so that the wire feeds properly. Doing so prevents deformities in the wire (in the case of too high of tension) that may cause the wire to wear out the contact tip prematurely. Cutting a GMAW liner too long can cause it to become misaligned with the gas diffuser. Conversely, cutting a liner too short may lead to debris build-up between the liner and gas diffuser. Both instances can lead to poor wire feeding, weld quality issues and premature contact tip failure. To prevent this problem, always follow the manufacturer’s instructions for installation, making certain that the liner is free of any burrs or short edges after you trim it. A smooth cut helps ensure smooth and consistent feeding of the welding wire. Some manufacturers offer a liner gauge to help you determine the proper length for your particular liner, while others print markings on the outside of the weld cable to show when the liner is twisted, allowing for more accurate trimming. If your gun does not have these markings, make sure the cable is fully extended when inserting the new liner. Remember to wear gloves when handling the liner and avoid dragging it on the ground. These precautions help prevent debris from being introduced into the GMAW gun and causing weld contamination and/or poor consumable performance. Burnback is one of the most common causes of downtime in a GMAW application and is a significant cause of premature contact tip failure. Proper equipment setup is one of the key defenses to protect your consumables. First, be sure that you have established the appropriate contact tip recess and wire stick out for your application, and that you maintain a correct contact-tip-to-work distance. Check electrical connections regularly and replace worn work leads or cables, as faulty ones can also cause the problem. Make sure to maintain the proper drive roll tension and install your liner properly, too. Both precautions minimize erratic wire feeding that could lead to burnbacks. Storing and handling GMAW consumables properly not only helps them last longer, but also perform better. Never store your GMAW consumables loose in a bin, since it can cause scratches on them that attract spatter and may lead to premature failure. Instead, keep them in their original packaging until you are ready to use them. Doing so will also protect the components from contaminants such as dirt or oil. Finally, always wear clean gloves when handling or replacing contact tips, nozzles and diffusers. Again, it helps prevent dirt, oil or other contaminants from adhering to them and also potentially entering the weld puddle. Like any welding process, GMAW has many factors to consider in order to achieve the best results. Make sure that you don’t overlook the impact of your GMAW gun, consumables and shielding gas as part of those. Being mindful of the selection process, storage and handling, and installation, among other things, can be beneficial to both your productivity and your bottom line in the long run.
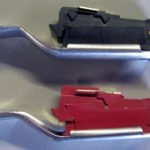
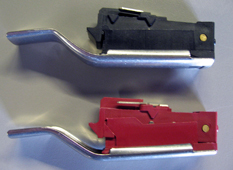
An improved switch design for Bernard® T-Gun™ MIG guns (formerly Tregaskiss® TOUGH GUN® semi-automatic MIG guns) is now available to improve the performance and the life of the extended lever switch over previous versions. The switch casing design has been updated to allow for improved retention tabs between two switch halves, which also reduces the chance of switches tearing apart during use. This updated lever design is more robust with improved strength. How can you tell the difference between the old version and the new 2011 design? Our new 2011 switch is red (shown below in the comparison between current design and new 2011 design).
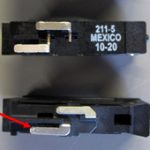
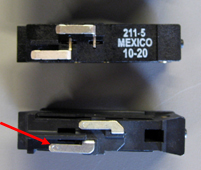
This improved switch design will significantly improve the performance and the life of the switch over previous versions. The new 211-5 switch became standard on all Bernard® TGX® XS and T-Gun™ semi-automatic compact series MIG guns (formerly Tregaskiss® semi-automatic MIG guns) on March 1, 2011. The switch casing design has been updated to allow for improved retention tabs between two switch halves, which also reduces the chance of switches tearing apart during use. This new design also provides for an enhanced connection between the exterior terminals and the switch (see Figure 1 below). How can you tell the difference between the old version and the new 2011 design? New 2011 design has the large tabs as shown in Figure 2 below.
As of March 13, 2011, the electronic trigger lock (Part Number 411-500) for Bernard® T-Gun™ series MIG guns (formerly Tregaskiss® TOUGH GUN® semi-automatic MIG guns) is no longer available. It has been REPLACED with Part Number 411-4.
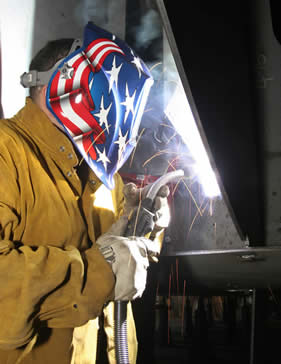
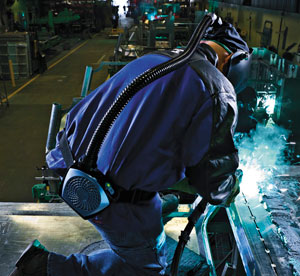
It’s tough to stay cool in the hot summer months, let alone when you are “under the hood” welding. Unfortunately, that heat can take a toll on your body, mind and performance. In addition to affecting your mental acuity – causing loss of concentration or, in extreme cases, confusion – excessive heat can also affect your motor skills, cause irritability and increase fatigue. Consuming liquids throughout the day is a critical part of staying cool. It is also helpful to supplement that approach with smart equipment selection and other cooling options. Consider these tips. As a general rule, selecting the lightest, most flexible MIG gun for the application is the best choice. In the case of a 400-amp application, a MIG gun rated at 300 amps may suffice for your application. That is because MIG gun amperages reflect the temperatures above which the handle or the cable on a MIG gun becomes uncomfortable. They do not indicate the point at which the MIG gun risks damage or failure. Also, you spend time in the day doing other things besides welding – moving parts, prepping materials or fixturing them. It’s highly unlikely that you will be operating the MIG gun at full amperage and full duty cycle at all times. Duty cycle is defined by the amount of arc-on time in a 10-minute period that the equipment can be operated at maximum capacity. Some MIG guns will offer 100 percent duty cycle, while others are rated 60 percent or below. It is important to research the MIG gun’s duty cycle prior to purchasing it in order to ensure it offers the necessary capacity for the application. But in most cases you don’t have to match your MIG gun amperage to the exact amperage of your application to get the job done. A lower amperage MIG gun can often suffice and keep you cooler. Selecting a MIG gun with the appropriate handle, neck and cables for your application can also help you stay cool. Typically, as a MIG gun’s amperage decreases so too does the size of the gun handle and the cable. That decrease in size and weight can help minimize the amount of energy you exert and reduce heat stress. Decide what type of MIG gun handle is most comfortable for you. MIG gun manufacturers often offer handles in curved and straight models. Regardless of the one you choose, make sure it is a lightweight, comfortable style that also meets the MIG gun and application’s amperage and duty cycle requirements. Typically, a smaller handle will be easier for you to maneuver. Additionally, some MIG gun manufacturers offer ventilated handles, which help reduce heat and are more comfortable to hold when welding for longer periods of time. In some instances, a water-cooled MIG gun may provide the smaller size desired for an application and would be a good choice to reduce fatigue on higher amperage applications, especially in a shop setting. When selecting power cables, choose the smallest and shortest power cable possible that can still meet the needs of your application. Smaller and shorter power cables are lighter and more flexible, and can help reduce your fatigue. They can also minimize clutter in the workspace and prevent excessive coiling that may be cumbersome to unravel or that could lead to poor wire feeding. An added advantage is that smaller and shorter cables tend to be less expensive, as well. Also, consider using a MIG gun with a rotatable or flexible neck to minimize unnecessary movement. Flexible necks can be easily adjusted to fit different welding angles. This feature helps minimize additional straining to reach a particular weld joint, and reduces the risk of fatigue or injury. Similarly, rotatable necks are a good option for welding out-of-position (including overhead), as they can be adjusted to reach the weld joint without changing the gun handle or its position. Bernard offers neck couplers, too, which allow you to connect multiple necks together to reach especially difficult joints more comfortably. Cooling vests are one option for beating the summer heat, but these can make some people uncomfortable and actually increase fatigue. Instead, you may want to consider a lighter cooling option like a cooling belt. For example, the CoolBelt™ from Miller Electric Mfg. LLC (an Illinois Tool Works company that Bernard is a division of) provides constant airflow over the welder’s head and face. The fan on the CoolBelt is secured on the lower back. Air flows upward through a piece of tubing that fits into your helmet; it’s then dispersed through the vents. The CoolBelt can reduce the temperature as much as 17 degrees. One advantage of the CoolBelt, compared to a cooling vest is its weight — it is significantly lighter so it helps improve stamina throughout the workday. Additionally, the CoolBelt doesn’t obstruct your range of motion, allowing you to perform more efficiently. Find Additional Safety Gear to Meet Your Personal Protection Needs
For companies faced with training new welders, it is important to instill good habits early in the process. Doing so helps ensure the welders are well prepared not only to create quality welds, but also to contribute positively to the operation’s productivity. It can also help the welders gain the confidence they need to become increasingly proficient. Following are 10 important things to teach new welders, to help them improve their skills and stay safe in the process. 1. Make safety a priority: It is critical that welders protect themselves from the heat and electricity generated by the welding process with the proper personal protective equipment (PPE). The arc is dangerous to both the eyes and skin. PPE includes: flame-resistant gloves, safety glasses, a welding helmet and a long-sleeved welding jacket. Flame-resistant clothing and steel-toed shoes are also recommended. Both the American Welding Society (AWS) and OSHA offer guidelines for PPE for specific environments. Be sure to use enough ventilation, local exhaust at the arc, or both to keep the fumes and gases below the Permissible Exposure Limit (PEL)/Threshold Limit Value (TLV)/Occupational Exposure Limits (OELs) in the breathing zone and the general area. Always train new welders to keep their heads out of the fumes. Explain the importance of reading and understanding the manufacturer’s instructions for equipment, your company’s safety practices, and the safety instructions on the label and the material safety data sheet for the filler metals being used. Routinely check for proper ground connections and stand on a dry rubber mat (indoors) or a dry board (outdoors) during welding to minimize the possibility of electrical shock 2. Install consumables properly: Good conductivity (the ability for the electrical current to flow along the welding circuit) helps gain good weld quality. New welders should always install their consumables – diffusers, nozzles, contact tips – according to the manufacturer’s recommendation, making sure that each component is securely tightened. In a gas metal arc welding (GMAW) operation, for example, the connection between the GMAW gun neck and diffuser needs to be secure to prevent shielding gas leaks. Secure connections also provide the surface area necessary to carry the electrical current throughout the GMAW gun to create a stable arc. Good connections also help prevent weld defects, support consistent productivity and reduce the risk of premature consumable failure due to overheating. 3. Cleanliness is critical: Dirt, oil, grease and other debris can easily enter the weld pool causing contamination that leads to poor weld quality and costly rework. Excessive oxidation and moisture can compromise quality weld. New welders need to learn proper cleaning procedure for the base material they are welding. In some cases, wiping the base material with a clean, dry cloth may suffice. However, welding on aluminum, for example, requires the use of a stainless steel wire brush designated for aluminum to clean out the joint before welding. A wire brush removes dirt and any of the oxides that may still reside on material surface. Regardless of the material, it is important to follow the proper instructions for cleaning before welding. 4. Always follow welding procedures: Welding procedures are the “recipe” needed to create consistent welds and should be followed at all times. The procedures for a given application have been carefully determined and qualified by experts to ensure that the recommended parameters are capable of yielding the desired results. Weld procedures include the required shielding gas mixture, recommended gas flow rate, and voltage and amperage ranges. These procedures also provide information on the type and diameter of filler metal to use, as well as the proper wire feed speed in the case of a GMAW or flux-cored arc welding (FCAW) application. 5. Understand the importance of filler metals:New welders can benefit from familiarizing themselves with the attributes of various types of wires, including flux-cored and metal-cored wires, as well as the techniques for welding with each type. For example, they should learn whether their filler metal requires a “push” or “pull” technique. Following old adages like, “If there’s slag, then you drag,” can help; it indicates that flux-cored wires, which produce slag, should be operated using a pull technique. New welders should also become familiar with the manufacturer’s specification sheet for additional operating recommendations. Learning to handle and store filler metals properly is also critical for new welders to learn. They should always wear clean gloves when handling filler metals and if they are responsible for storing them, should do so in a clean, dry environment. 6. Stay comfortable: Keeping cool and comfortable during the welding process can help welders lessen the chance of injuries associated with repetitive movement and reduce overall fatigue. When possible, new welders should learn to minimize cumulative strength moves, material handling or constant motion. They should also use a GMAW gun with a comfortable handle and cable style, as these factors contribute to the equipment’s maneuverability. New welders should be encouraged to play an active role in improving workspace ergonomics. Typically, the more input a welder offers about the job, the more satisfied he or she will be. Plus, that involvement can help ensure greater safety compliance and lower workers’ compensation costs for injuries. 7. Know the material properties: Every material has different mechanical and chemical properties. Helping new welders understand the difference between materials — particularly how they react to heating and cooling — is a key component of training. For example, austenitic stainless steel conducts heat at around half the rate of mild steel, but has a much higher rate of thermal expansion when welded; it also has a more localized heat affected zone (HAZ) that can lead to buckling when the weld cools. Welders who are aware of such properties can take precautions such as clamping to prevent distortion. Similarly, many materials require pre- and post-weld heat treatments to control the cooling rate and prevent cracking. When welders are familiar with such material attributes, they’re better prepared to make necessary adjustments during the welding process. 8. Visually inspect the welds:Knowing how to conduct an accurate visual inspection of a completed weld is the first step in quality control. It is also the quickest and least expensive method of inspection. New welders should learn how to identify weld defects that have porosity, for example, since the presence of this weld defect on the surface often indicates a similar problem throughout the weld. Identifying the defect early on helps prevent the time and cost associated with other testing methods, including x-ray or NDT (non-destructive testing) inspections. Other defects that new welders should learn to identify include lack of penetration (high, ropey welds), excessive penetration (sunken welds) and undercutting (characterized by a notch in the base material). It is important that welders inspect for weld cracks, which are among the most common weld defects to occur. 9. Learn how to troubleshoot: Identifying and rectifying welding problems quickly is a key skill for new welders to learn. Good troubleshooting skills not only help reduce downtime, but they also contribute to good weld quality and productivity. Such skills can also help reduce costs associated with rework. New welders can benefit from learning how to adjust gas flow rates properly and/or identify gas leaks in order to solve instances of porosity. They should also know how to make adjustments to amperage and voltage settings if they encounter issues such as lack of penetration, excessive penetration or undercutting. Identifying welding problems associated with worn consumables is also important, since poor conductivity can result in an unstable arc and lead to a variety of weld defects. 10. Maintenance makes a difference: From the power source to the GMAW gun and consumables, every part of the welding system requires maintenance to keep it operating efficiently and effectively. New welders should become familiar with proper maintenance procedures — preferably preventive ones — as part of the ongoing upkeep of the entire welding system. Regularly checking that the connections throughout the length of their gun or torch are tight is important, as is visually inspecting the front-end consumables for signs of wear. In the case of a GMAW gun, the welder should replace nozzles or contact tips that have spatter buildup on them to prevent issues such as poor gas coverage or an erratic arc that will likely lead to weld defects. Welders should regularly check the power source, primary power line, gas cylinders and gas distribution system to ensure that they are working properly. They also need to replace faulty gas regulators or cables and hoses that show signs of wear, cracks or damage. May 22, 2009 This optional insulator for the 601 series water-cooled nozzle is now made of high-temperature Teflon material rather than ceramic. This new design is shorter than the previous ceramic version, but outperforms the previous design since it uses a more durable material. This optional nozzle insulator is available as a separate item: Part #601-5-75-4
May 22, 2009 This thread-on nozzle system features a TOUGH LOCK® retaining head with an external thread and a tapered seat.
May 22, 2009 TOUGH LOCK® extra heavy duty (EHD) contact tips (603-20 series) are ideal for large wire sizes, 7/64″ and 1/8″ for example, that can’t be handled with the TOUGH LOCK heavy duty (HD) contact tip series.
January 29, 2009 This adaptor is designed to allow the use of TOUGH LOCK® consumables on Tweco®-style air-cooled robotic necks without changing the original tool center point (TCP).
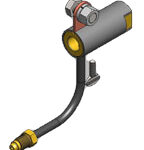
January 29, 2009 Newly designed, this Miller® quick-connect block (adaptor) receives a 214-1 Miller power pin and assembles into feeders that are compatible with OTC®, Tweco® #4, and Tweco #5 power pins. Part Number: 417-63
September 19, 2008 Due to popular demand, Tregaskiss now offers a TOUGH LOCK® extended life heavy duty (EXHD) contact tip. These contact tips are available in packs of 100 (part #403-27-116).
June 8, 2009 Tregaskiss is pleased to offer a new power pin connection for Cloos® SZ-style wire feeders. This is a complete connection (similar to our Euro style MIG guns) which can be ordered on Tregaskiss® TOUGH GUN® robotic and automatic MIG guns and Bernard® T-Gun™ semi-automatic MIG guns (formerly Tregaskiss TOUGH GUN semi-automatic MIG guns). Robotic applications will also require an external cord set for the clutch. NOTE: This connection is compatible only with a QUICK LOAD® liner. This product is considered a Special Product and has a 15-day lead time, and is available as a product upgrade from a power pin or Euro (part #678C), or on a NEW Special Gun (SG) from Tregaskiss (various SG numbers).
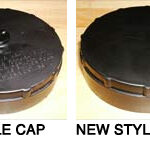
July 1, 2009 Tregaskiss has designed a power pin (part #214-41) that can be used in place of the actual Fronius® Power Pin for the VR15000 wire feeder. This new power pin is compatible with Tregaskiss TOUGH GUN® robotic and automatic MIG guns and Bernard® T-Gun™ semi-automatic MIG guns (formerly Tregaskiss TOUGH GUN semi-automatic MIG guns). A liner cap adaptor (part #214-41-3) is also available for upgrading existing Fronius power pins to the QUICK LOAD liner system. Fronius wire feeders can come with several types of connections. The following chart indicates the recommended Tregaskiss power pin solution for each:
September 29, 2009 Tregaskiss has made a change to its quick-connect blocks 417, 417-50, 417-60 and 417-63. The brass fitting on the end of the gas hose (as shown in the 417-63 Miller® quick-connect block image to the right) has been removed from these quick-connect blocks.
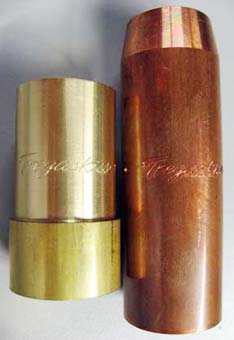
November 26, 2009 Customers may notice that some Tregaskiss® parts and consumables are arriving in different bags. We transitioned from the white bag design branded with the TOUGH GUN® name to a black bag design with the Tregaskiss brand name. In addition to changing the branding and color of the bags, the overall usability has also been improved. The new Tregaskiss black bags offer a clear window on the printed side of the bag to make visual product identification easier. To increase the hanging capacity of the bags, we’ve added a second hanging hole on our larger bags and a new double-sealed header on all bag sizes. We have also changed all the hanging holes from circular to sombrero shape for compatibility with a wider variety of hook sizes and shapes. The roll marks pressed into our genuine parts and consumables have also migrated from a plain font “TOUGH GUN” to the script-style Tregaskiss logo. This will help customers more easily distinguish genuine Tregaskiss consumables from generic impostors. The primary reason for these packaging and roll mark changes is to more accurately market our Tregaskiss consumable platform under the Tregaskiss trademark. Marketing these parts and consumables under the TOUGH GUN name could be misinterpreted to mean that these items can only be used on TOUGH GUN products. However, Tregaskiss parts and consumables have actually been designed to maximize compatibility with Tregaskiss TOUGH GUN robotic and automatic MIG guns, Bernard® T-Gun™ semi-automatic MIG guns (formerly Tregaskiss TOUGH GUN semi-automatic MIG guns), and Bernard TGX® series MIG guns (formerly Tregaskiss TGX series MIG guns).
July 14, 2010 Tregaskiss has expanded its QUICK LOAD® liner offering ot include three new wire sizes for 0.030″, 1/16″ to 5/64″, and 0.078″ to 3/32″ wires. QUICK LOAD liners consist of a two-piece system that requires less than half the time and effort for replacement compared to conventional MIG gun liners, and they also ease routine maintenance. The welding operator simply installs the retainer in the power pin on the first use. During subsequent liner replacements, the QUICK LOAD liner feeds through the front of the MIG gun, which can remain attached to the wire feeder during liner replacement. The welding operator needs only to remove the front-end consumables (nozzle, retaining head and contact tip) and slide the liner over the wire, using it as a guide. There is no need to cut the wire in the MIG gun. The QUICK LOAD liners for 0.078” to 3/32” wire require the new 415-24 QUICK LOAD liner retainer, while all other liner sizes use Tregaskiss’ existing 415-26 retainer. Tregaskiss offers QUICK LOAD liners in lengths up to 25 feet for Bernard® T-Gun™ semi-automatic MIG guns (formerly Tregaskiss® TOUGH GUN® semi-automatic MIG guns) and up to 15 feet long for robotic applications. On semi-automatic applications, the liners can be easily changed even when the MIG gun is mounted to feeders on booms; there is no need to climb up to the feeder. Similarly, on robotic applications, the QUICK LOAD liner minimizes downtime by eliminating the trouble of maneuvering around tooling or transferring systems to remove the MIG gun from the wire feeder. It also allows for liner changeover from a safe-zone outside the work cell during routine pauses in production. The QUICK LOAD liners are particularly beneficial when coupled with Tregaskiss’ TOUGH GUN ThruArm® series robotic MIG guns, as the wire feeders in through-arm systems are closely positioned next to the robot’s casting and can be cumbersome to move during conventional liner changeover.
November 12, 2010 Effective Monday, November 12, 2010, Tregaskiss has released a new design for the TOUGH GUN® reamer cutter blades. The new product is made in North America and has passed a series of stringent tests. As a result, we are proud to implement this product, approved by the Tregaskiss Engineering team, as our new standard offering. The new design will be implemented as a ‘running change’ and will be sold under the same part numbers as the previous design.
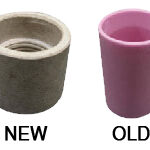
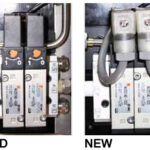
May 7, 2008 Previously we have supplied the type of TR-2210 solenoid valves (made by SMC) for the TOUGH GUN® reamer as shown in the image on the left (OLD). We now offer an improved DIN connection for this product (also from SMC) shown in the image on the right (NEW). This new product is rated “IP65” (as defined in international standard IEC 60529), where: NOTE: This product is designed for use ONLY on TOUGH GUN reamers with externally mounted valves. Refer to product insert INS053 for more information about TR-2210 solenoid valves for TOUGH GUN reamers with external valves.
August 21, 2008 The TOUGH GUN® sprayer, used as a stand-alone unit or on a TOUGH GUN reamer, has been improved in the following ways: Refer to product insert INS058 for more information about RR-1320 anti-spatter reservoirs for TOUGH GUN reamers.
May 14, 2008 The design of the wire cutter blade has been improved to more securely fasten to the TOUGH GUN® wire cutter (WC-100). The WC-100-7 wire cutter blade kit includes the new blade and insert, and is backwards compatible with older wire cutters. Product insert INS049 provides installation and replacement instructions. Factory-installed wire cutter features a built-in heli-coil and use a “socket-counter-sunk-head cap screw” (SCHCS) or flat-head screw to fasten the blade to the wire cutter.
March 2, 2008 The next generation TOUGH GUN® reamer will knock you out with its powerful one-two punch: Rugged durability PLUS new features that improve reliability, ease maintenance, and provide a safer and more accurate setup. Watch our online animation to learn more about the Next Generation TOUGH GUN reamer from Tregaskiss.
MIG Gun Consumables: Tips to Extend Life
MIG Gun Consumables: Tips to Extend Life
The Heat Factor
The Anti-Spatter Solution
Proper Storage and Handling
Establish and Maintain Good Connections
Trim Liners Correctly
Recess/Extension Amperage Wire Stick-Out Process Notes 1/4-in. Recess > 200 1/2 – 3/4in. Spray, high-current pulse Metal-cored wired, spray transfer, argon-rich mixed gas 1/8-in. Recess > 200 1/2 – 3/4in. Spray, high-current pulse Metal-cored wired, spray transfer, argon-rich mixed gas Flush < 200 1/4 – 1/2in. Short-current, low-current pulse Low argon concentrations or 100 percent CO2 1/8-in. Extension < 200 1/4 in. Short-current, low-current pulse Difficult-to-access joints Mind the Contact Tip Position and Nozzle Size
Other Considerations
GMAW Guns, Consumables and More – Common Questions Answered
GMAW Guns, Consumables and More: Common Questions Answered
How do I determine what amperage GMAW gun I need
Besides amperage, what else should I consider when selecting a GMAW gun?
What type of shielding gas is best for my application?
How can I make my GMAW consumables last longer?
What is the proper way to trim and install my GMAW gun liner?
How can I protect my contact tips from burnback?
What’s the best way to store and handle my GMAW consumables?

PRODUCT IMPROVEMENT – New 211-5-8 Extended Lever Switch
PRODUCT IMPROVEMENT –
New 211-5-8 Extended Lever Switch
What Changed?
Frequently Asked Questions
Current design (top) vs.
New 2011 design (bottom)PRODUCT IMPROVEMENT – New 211-5 Switch
PRODUCT IMPROVEMENT –
New 211-5 SwitchWhat Changed?
Frequently Asked Questions
New 2011 design (bottom)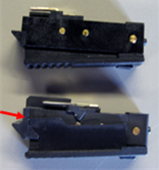
Current design (top) vs.
New 2011 design (bottom)PRODUCT UPDATE – Trigger Lock 411-500
PRODUCT UPDATE –
Trigger Lock 411-500 for T-Gun Series MIG GunsAffected Part Numbers
Stay Cool When Welding In The Summer Heat
Stay Cool When Welding In The Summer Heat
Tip One: Don’t go over amperage
Tip Two: Get a good handle
Tip Three: Stay light and flexible
Tip Four: Consider a cool option
Teaching New Welders to Improve Quality and Productivity
Teaching New Welders to Improve Quality and Productivity
NEW PRODUCT – Nozzle Insulator for 600 amp Robotic Water-Cooled MIG Gun
NEW PRODUCT —
Nozzle Insulator for 600 amp
Tregaskiss Robotic Water-Cooled MIG Guns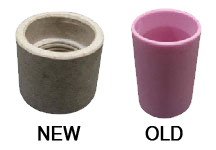
NEW PRODUCT – Thread-On Nozzle System
NEW PRODUCT —
Tregaskiss Thread-On Nozzle System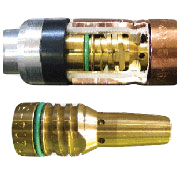
to copper threads and prolonging the life of the neck
TOUGH LOCK consumable series
NEW PRODUCT – TOUGH LOCK EHD Contact Tips
NEW PRODUCT —
TOUGH LOCK Extra Heavy Duty Contact Tips
NEW PRODUCT – TOUGH LOCK Adaptor for Tweco-Style Robotic Necks
NEW PRODUCT —
TOUGH LOCK Adaptor for Tweco Style Robotic Necks
Part Numbers and Descriptions
PRODUCT IMPROVEMENT – Miller Quick-Connect Block
PRODUCT IMPROVEMENT —
Miller Quick Connect Block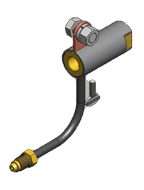
NEW PRODUCT – TOUGH LOCK EXHD Contact Tips
NEW PRODUCT —
TOUGH LOCK Extended Life Heavy Duty Contact Tips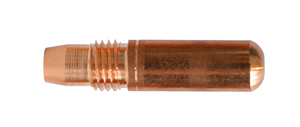
NEW PRODUCT – Cloos Power Pin
NEW PRODUCT —
Tregaskiss Power Pin Connection for Cloos Wire Feeders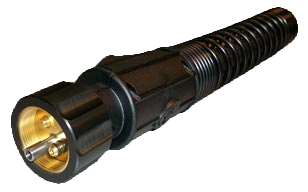
Ordering Information
NEW PRODUCT – Fronius Power Pin
NEW PRODUCT —
Tregaskiss Power Pin for Fronius VR1500 Wire Feeders
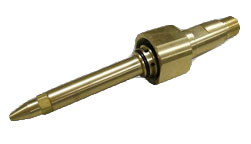
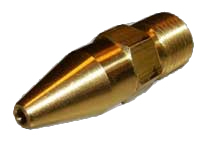
QUICK LOAD™ Liner System by replacing it with the
Tregaskiss Liner Cap (part #214-41-3).Fronius® Feeder Connection Type Tregaskiss Part Number Fronius “North America” Power Pin 214-17 Tweco® #4 214 Euro Connection Euro Fronius Power Pin #4.045.848.638 for VR1500 Feeder 214-41 Fronius F++ Not Available PRODUCT IMPROVEMENT – Quick-Connect Blocks
PRODUCT IMPROVEMENT —
Quick-Connect Blocks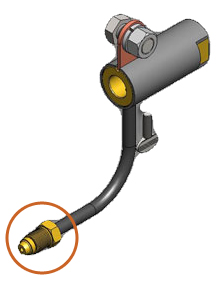
Affected Part Numbers and Descriptions
PRODUCT CHANGE – Tregaskiss Bags and Roll Marks
PACKAGING IMPROVEMENT —
Changes to Tregaskiss Bags and Roll Marks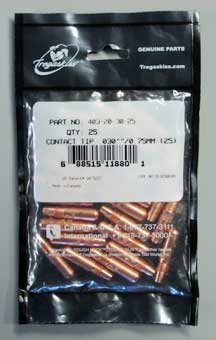
PRODUCT UPDATE – New QUICK LOAD Liner Wire Sizes
PRODUCT UPDATE —
Expanded QUICK LOAD Liner Product Offering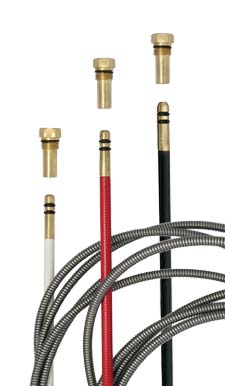
PRODUCT IMPROVEMENT – Reamer Cutter Blades
PRODUCT IMPROVEMENT —
TOUGH GUN Reamer Cutter BladesSummary of Design Changes

PRODUCT IMPROVEMENT – Solenoid Valve for TOUGH GUN Reamer Robotic Nozzle Cleaning Stations
PRODUCT IMPROVEMENT —
Solenoid Valve for TOUGH GUN Reamers with External Valves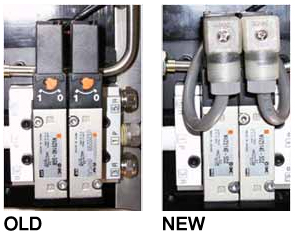
PRODUCT IMPROVEMENT – TOUGH GUN Sprayer
PRODUCT IMPROVEMENT —
TOUGH GUN Sprayer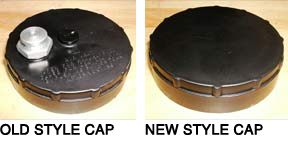
PRODUCT IMPROVEMENT – Wire Cutter Blades
PRODUCT IMPROVEMENT —
Wire Cutter BladesNEW PRODUCT – Next Generation TOUGH GUN Reamer
NEW PRODUCT —
Next Generation TOUGH GUN Reamer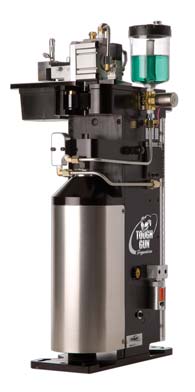
The TOUGH GUN Reamer just got TOUGHER!


