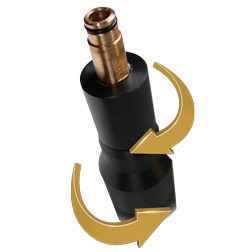
Tregaskiss QUICK LOAD Liner Replacement Race
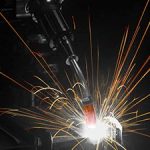
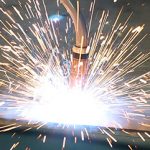
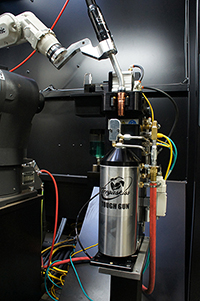
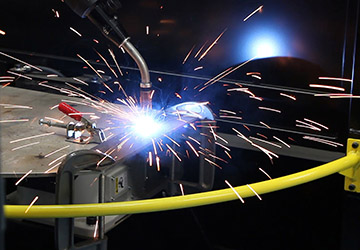
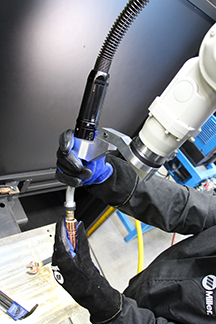
Have you ever timed the difference between changing a rear-loading liner and a QUICK LOAD® Liner? We have! As the clock counts away, it took 2:05 minutes to change a QUICK LOAD Liner. As the robot using the QUICK LOAD Liner is already up and welding, the rear-loading liner continues to be installed. There are many benefits to using a QUICK LOAD Liner in addition to reducing downtime. A gun that stays connected to the feeder during liner replacement increases safety, reduces scrap and reduces wear. It also increases safety as there is no need to climb up to boom-mounted feeders or enter robotic cells. It reduces scrap wire as liners are removed and replaced over the wire. Reducing wear on the gun power pin, worn o-rings can cause gas leakage and poor weld quality. It took 3:31 minutes to change the rear loading liner — that’s 40% more production downtime! This was an ideal setup with an easily accessible feeder rear-loading liner replacement downtime increases as access to the feeder becomes more challenging. QUICK LOAD Liner Less Downtime, Less Waste, More Safety.
Watch as we compare the time it takes to replace a liner. QUICK LOAD® liners are able to be replaced in half the time of a conventional rear-loading liner.
Changing a conventional liner can cost you in more ways than one. The Tregaskiss® QUICK LOAD® liner AutoLength™ system can help you eliminate those costs.
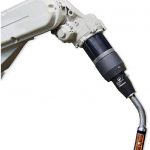
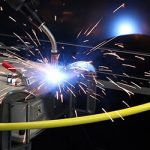
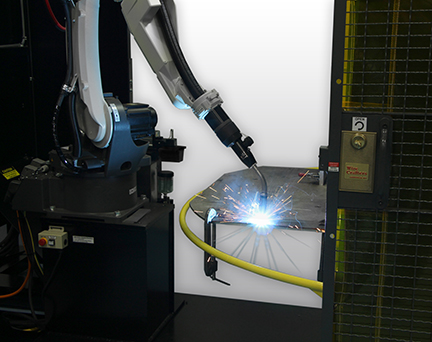
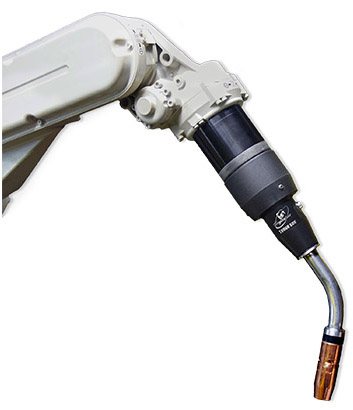
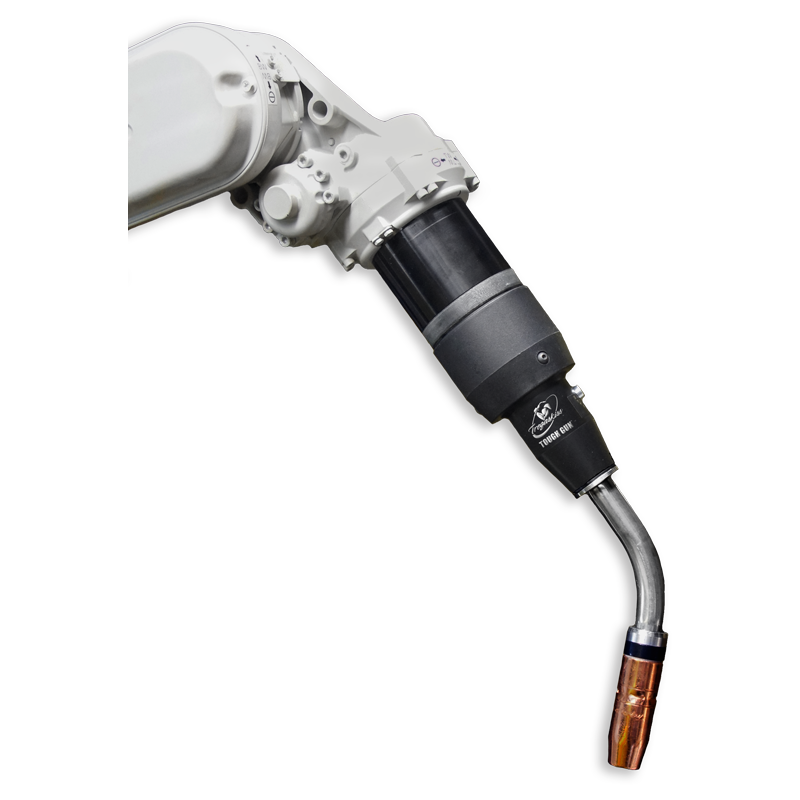
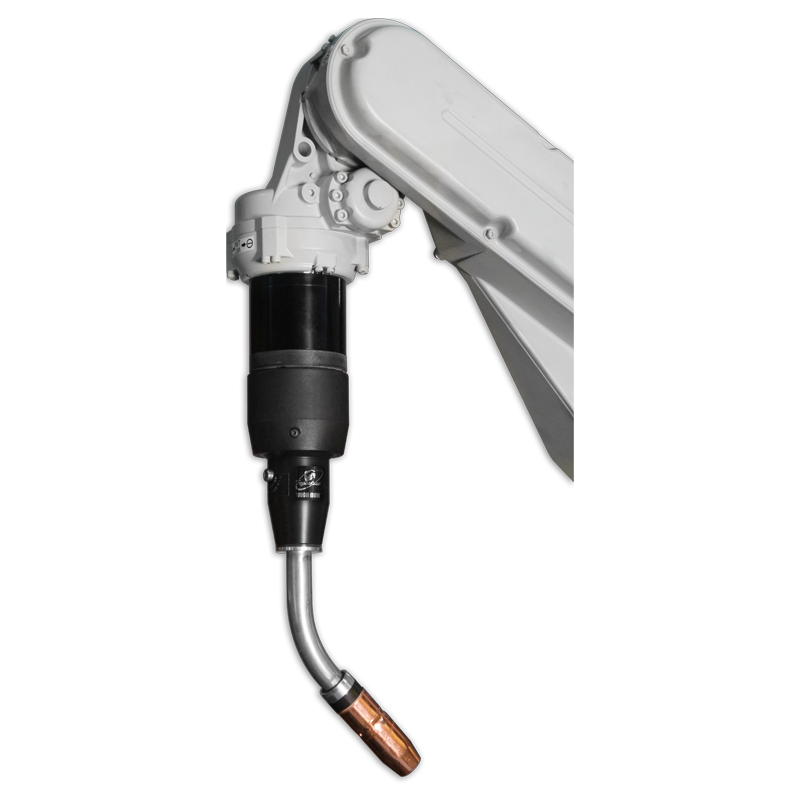
Designed with our unique and durable low-stress robotic (LSR) unicable, TOUGH GUN® TA3 robotic air-cooled MIG guns feed through the arm of today’s through-arm style robots and provide outstanding precision and reliability.
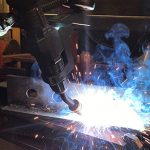
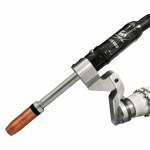
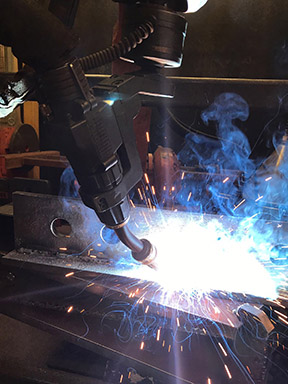
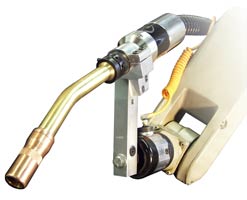
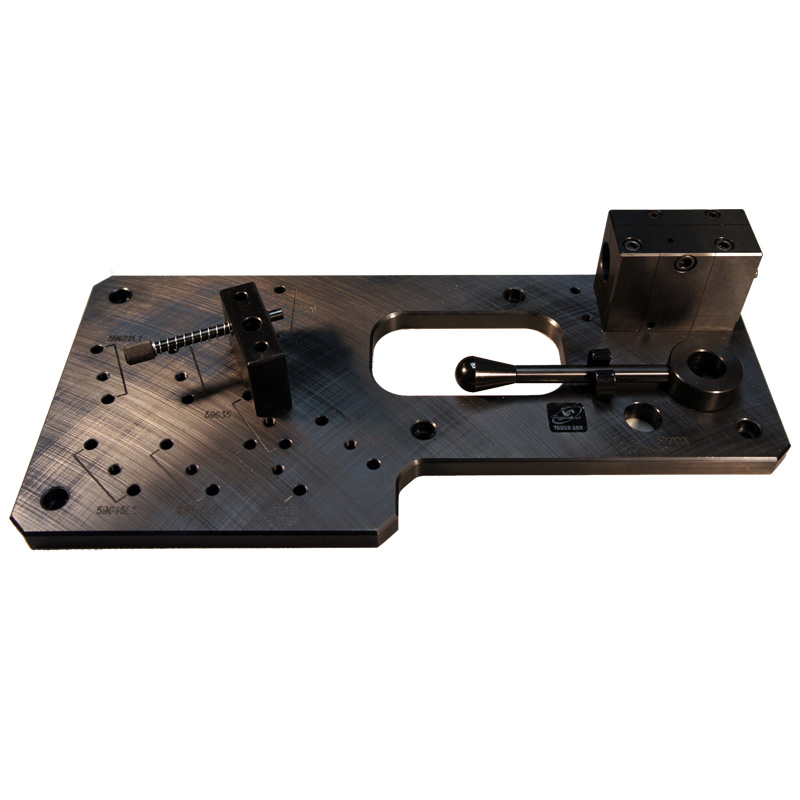
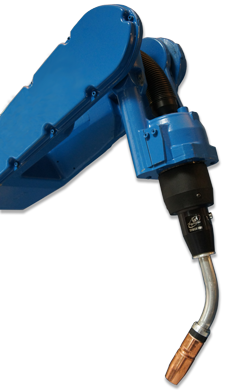
Tregaskiss® fixed automatic MIG guns are engineered for hard tooling automation applications requiring a simple, durable and repeatable MIG gun. Available in air-cooled and water-cooled models, these automatic torches can be configured with the same consumables as your Bernard® semi-automatic or Tregaskiss robotic MIG guns to simplify your inventory.
Tregaskiss® fixed automatic MIG guns are engineered for hard tooling automation applications requiring a simple, durable and repeatable MIG gun. High performance consumables plus the armored neck and body plus the simple internal connections equal a torch that is quick and easy for you to maintain for maximum up-time and throughput. Models available in air-cooled or water-cooled.
Automating spatter removal helps to extend the life of your robotic MIG welding guns and consumables, benefiting your bottom line, production up-time and throughput. Choose between our TOUGH GUN® TT3 reamer (analog model) or our new TOUGH GUN TT3E reamer (Ethernet model), further enhanced with digital Ethernet communication for better integration.
The Tregaskiss® TOUGH GUN® TT3 reamer is TOUGH on spatter and operates reliably in even the harshest welding environments. Automating spatter removal will help to extend the life of your robotic MIG guns and consumables, benefiting both your bottom line and your production up-time and throughput.
Tregaskiss® AccuLock™ R consumables are designed for increased tip life, which can reduce your replacement frequency and related planned downtime. The longer lifespan of AccuLock contact tips means fewer human interactions within your welding cells and fewer accidental errors as a result. With contact tip cross-threading issues also virtually eliminated, you’ll spend less time troubleshooting and more time on proactive weld quality and productivity initiatives.
Tregaskiss® AccuLock™ R consumables are designed for increased tip life, which can reduce your replacement frequency and related planned downtime. AccuLock HDP contact tips can increase life by an additional 10x or more in pulse welding applications.
Tregaskiss® AccuLock™ R consumables are designed for increased tip life, which can reduce your replacement frequency and related planned downtime. AccuLock HDP contact tips can increase life by an additional 10x or more in pulse welding applications. In most cases, your current tip and diffuser can be replaced with no impact to tool center point (TCP), making this upgrade low effort, low risk, and high payoff.
Tregaskiss is making it easier for you to get the exact MIG gun you need — Now you can customize a product for your specific application using our new mobile-friendly online configurators!
Contact tips are often referred to as the smallest fuse in the fuse box that is your robotic welding cell. But this small fuse can have a big impact on productivity. In terms of overall efficiency, the contact tip is key. Contact tips depend upon repeatability to be effective in the welding process. Learn more about the different types of available — and how choosing the right one for your application can improve results and save money. How do contact tips affect efficiency? When an operation changes contact tips every few hours, there is an obvious effect on productivity. It requires the weld cell to be shut down, and the operator may have to enter the cell to change out the tip. If the robot is buried inside the welding line, contact tip changeover takes even longer. Not only are these changeovers inefficient, but they also introduce the potential for mistakes. Every time a human interacts with the robot, there’s a risk of incorrect consumable installation or other improper adjustments that can lead to poor quality welds and costly rework. Choosing the right tip depends on the results you’re looking for and the needs of the application. In the automotive industry, for example, choosing a quality contact tip is critical since unplanned downtime is the enemy of a high-volume multi-robot operation. Contact tips in these applications need more wear resistance. A high-quality contact tip provides a longer life and a more consistent and stable arc. Longer tip life results in more robot uptime, less time wasted on non-value-added labor for tip changeovers and reduced human interaction with the robot that could lead to error. But the contact tip itself isn’t the only factor impacting tip life — the welding wire, part fit-up, robot programming and grounding also contribute. Different types of contact tipsThere are several types of contact tips available. Understanding the differences can help you select the best choice for your operation. 1. Copper contact tips: Contact tips made from this material are the most conductive to transfer welding current. But copper is also the softest option and will keyhole (or wear the bore unevenly) much faster. If keyholing is a pain point in your operation, this may not be the best choice. The initial cost of copper contact tips tends to be cheaper than other options. 2. Chrome-zirconium contact tips: This alloy provides better wear resistance and longer life than copper tips, holding up better to the demands and increased arc-on time of robotic welding. They are slightly less conductive than copper tips, but they are still sufficient for most robotic applications. 3. HDP contact tips: HDP tips can last 10 times longer than copper tips — and up to 30 times in some cases — depending on the application and waveform being used. Operations may be able to go from changing contact tips every two hours to only changing tips once a week. HDP contact tips are engineered to endure wear better, providing increased resistance to arc erosion in pulsed welding, as well as spray transfer and CV MIG. The precise fit between the tip and the wire also results in good arc stability to help produce high-quality welds. Because HDP contact tips reduce the impact of the welding current decline over time, they can provide a more stable and consistent arc over the life of each contact tip. These tips work best in applications that use high-quality copper-coated solid wire. Common pitfalls with contact tips 1. Only considering price: Many operations may look only at the price per tip when they purchase contact tips. But it’s important to look beyond the initial price and consider the big picture, which includes the downtime and labor required for changeover, along with any quality issues that may be happening in the weld cell. If a contact tip lasts three times as long, the robot can continue to weld instead of being down for a tip changeover — and there is less human interaction inside the cell . 2. Ignoring ID tolerance issues: The size and cast of the welding wire are important in making a decision about contact tips. Some tips need to be undersized for the welding wire used, while some tips need to match the wire size. And the same exact wire will vary in the necessary contact tip size depending on if the wire comes in a small spool or a 1,000-pound barrel. For most copper and chrome-zirconium tips, it’s recommended to undersize the contact tip by a single wire size when using a 500-pound barrel or greater of wire due to the wire cast. With smaller sizes of wire packaging, use contact tips that match the wire size. The goal is to maintain a clean, consistent contact between the wire and the tip so the weld current is conducted as efficiently as possible. 3. Using poor quality wire: In most cases, poor quality welding wire will lead to poor results from your contact tips. This is due to the lubrication on the wire, as well as the consistency of the wire diameter; inconsistent wire diameter wears the tip faster. Choosing a higher quality wire can improve tip life and produce better results. Also, be aware that wires without a copper coating and cored wires wear tips much faster. Using copper-coated solid wires typically slows contact tip wear. 4. Not being open to change: Some companies think the status quo is fine because they aren’t experiencing issues. They change tips in the robotic welding cell every couple of hours, even if those tips don’t need to be changed. Looking at the true length of their current tips or investing in higher-quality tips could optimize efficiency and the overall process — saving unplanned downtime and reducing the need for non-value-added labor hours. Analyzing the robotic operation So how can companies best analyze their robotic welding operation to determine when to change to a different type of contact tip? Contact tips react differently to different applications, so an important first step is to run trials with varying quality levels of tips. This will provide an accurate comparison and a level set for expectations. Run each tip to failure, including the current brand, rather than proactively changing the tip on a set schedule. Be sure to log the time each part lasted. Ideally, run multiple contact tips in any trial to eliminate any outliers. This type of trial can help to identify how much labor time is spent on tip changeovers, how much robot uptime can be achieved and what failures are occurring with each type of contact tip. If an operation previously experienced 10 burnbacks a day and reduces that to zero by using a higher quality contact tip, this can help eliminate unplanned downtime. Optimizing contact tip efficiency in robotic welding Gaining a good return on investment (ROI) from a robotic welding system doesn’t happen by chance. It’s a matter of optimizing the robot and the robotic welding cell to operate at peak efficiency. And while this task is a team effort, it is led by the robotic welding supervisor. So, what can the supervisor do to guide the way, while looking at more advanced considerations? Pay close attention and collaborate. Even if a robotic welding system is meeting production and quality requirements, it’s important that robotic welding supervisors commit to a continuous improvement process. Regularly looking for ways to increase efficiencies could provide the ability to produce more parts. It can also help identify issues within the robotic welding cell before they become problematic and cause downtime. Robotic supervisors should pay close attention to details such as cable and consumable management, parts handling and workflow to pinpoint areas that could be streamlined. The goal is to avoid settling for less than optimal work practices to realize the full potential of the system. Doing so can provide companies with higher productivity and profitability and can set them apart from their competitors. While the robotic welding supervisor may oversee the overall health of a robotic welding cell, the robot operator works hands on with the system daily to load and unload parts. For this reason, they are an excellent resource to rely on for insight into potential or existing problems, such as: • Excessive spatter Quality technicians are another internal resource to help the robotic welding supervisor identify any issues and drive performance improvements. In conjunction with welding engineers, they can help rectify issues like overwelding or part distortion. External sources, such as a robotic welding integrator or equipment manufacturer, can help troubleshoot and offer advice to gain efficiencies. In many cases, they can also offer ongoing training that helps everyone improve their interaction with the robotic welding cell. This article is the second in a two-part series focused on key information welding supervisors should know to help ensure robotic welding success. Read article one, Best Practices for Robotic Welding Supervisors. With careful planning and attention to detail, companies that invest in a robotic welding system can gain advantages, such as: • Increased productivity The welding supervisor managing the robotic welding cell plays a key role in achieving these results — and with some best practices in mind, can help ensure long-term success. There are some basics that provide a good starting point. Understand the robotic welding system It’s important for welding supervisors to understand how to quickly troubleshoot issues and how to adjust the weld programs, as needed. Having a solid understanding of the functions of the robotic welding gun, welding consumables, power cables, and their impact on quality and productivity is also important. It makes it easier to identify problems and provide the best solution. Establish documentation and maintenance • The names of all employees who enter the weld cell, when they entered and why This documentation provides insight into changes in the robotic weld cell, making it easier for maintenance staff to troubleshoot any issues. It can also help the welding supervisor and maintenance personnel determine the appropriate frequency for a preventive maintenance schedule, which helps reduce unexpected downtime. When it comes to automating the welding process, many companies opt for robotic welding systems due to the flexibility they provide and their ability to reach and weld multiple joints. These systems provide the advantages of speed and accuracy and can be reprogrammed to manage new projects. But these robotic systems aren’t right for every application. In industries such as oil and gas, railcar, structural steel fabrication and shipbuilding, joint configurations are often less complex, consisting of a single part to be welded as opposed to full assemblies. In this case, fixed automation welding is generally preferred. Fixed automation welding, sometimes called hard automation welding, is commonly used for welding pipes, structural beams, tanks and vessels in a shop environment prior to them being moved to the jobsite where they will be placed into service. It can also be used for welding steel plates for the general fabrication industry or in the manufacturing of hot water heaters and propane tanks. One common factor in these applications is the need for either longitudinal or circular (inside or outside diameter) welds that require repeatability as opposed to versatility. Other factors that make applications suitable for fixed automation welding include: 1. A high volume of similar parts with low variety In some cases, fixed automation welding can help companies meet high production goals at relatively low cost. And it is easy for a single operator to oversee and load parts, making it desirable from a labor perspective — particularly given the shortage of skilled welders the industry is facing. A fixed automation welding cell can be set up in two ways. The first option requires tooling that holds the part in place, while a fixed automatic gun moves along the weld joint by way of a mechanized seam welder or a track and carriage that holds the gun in place. This option would be viable for a long structural beam, for example. In the second scenario, the welding gun may be fixed in a single place by tooling while the part, such as a pipe, rotates on a lathe or circumferential fixture during the welding process. In today’s marketplace, there is equipment that can rotate parts in a wide range of diameters and weights. Tooling for fixed automation welding offers minimal flexibility and can be expensive to adjust for new parts. This is true particularly in comparison to a robotic welding system that can be reprogrammed to articulate and weld in different positions along the X, Y and Z axes. When investing in the tooling for fixed automation welding, it’s important for companies to determine upfront what their long-term applications will be. Will they continue to weld parts that are straight or circular for the foreseeable future? One very important part of the fixed automation welding system is the welding gun. It is not uncommon for companies to take a do-it-yourself (DIY) approach to this piece of equipment, fixturing a semi-automatic gun in place with various components to mimic the performance of a fixed automatic gun. Sometimes this is done out of convenience, due to the shop having an abundance of semi-automatic guns, or because of a perceived cost savings. Unfortunately, a DIY gun assembly for this process can be time-consuming to set up and maintain, which adversely affects productivity. It also is not optimized for fixed automation welding. Quality may suffer due to off-seam welds or other inconsistencies, leading to rework that further reduces throughput and increases costs. Also, if replacement parts are needed there could be variations in the assembly since it is not set up for this process. Again, this can lead to quality issues. Instead, it is important to invest in a fixed automatic gun that is designed for the process. These guns have consistent components that can be sourced from manufacturers so that the welds are repeatable. And the gun manufacturers can provide service and technical support. Guns need to be specified or customized for the application according to the available space, taking into account the distance between the gun and the part and also how far away the wire feeder is. These factors impact neck length and bend or angle, as well as cable choices. Necks are typically available in the marketplace in varying lengths, from approximately 4 to 12 inches, and with either a straight neck or 22-, 45- and 60-degree bends. Companies need to determine the reach required to meet the weld joint, as well as the necessary angle for completing a sound weld. Cable lengths vary from as short as 3 feet to as long as 25 feet. Longer cables are ideal for reaching a wire feeder placed further away from the part, including on a boom. In other situations, a company may mount the feeder directly on the tooling or nearby, in which case a cableless gun is an option for air-cooled operations. These guns plug directly into the wire feeder via a power pin and do not require a cable. Amperage and duty cycle also need to be factored into the selection of a fixed automatic gun, and both depend on the thickness of the material being welded and the amount of arc-on time required. Air-cooled fixed automatic guns are typically available from 300 to 500 amperage models, offering either 60% or 100% duty cycle. Duty cycle is defined by the amount of time within a 10-minute cycle the gun can weld without becoming overly heated. The necks on these guns are particularly durable since they have fewer internal channels than a water-cooled gun and rely on the ambient air to cool them. They are also more resistant to bending, and replacement parts are less expensive. For higher-amperage fixed automation welding applications that require longer periods of welding on thicker material, a water-cooled gun may be a better choice. These models are typically available in amperages ranging from 450 to 600 amps and offering 100% duty cycle. Hybrid water-cooled guns are another option. These fixed automatic guns have a sturdy neck similar to an air-cooled model with water channels running external to it. These channels make the guns easier to maintain than water-cooled guns. Along with selecting the appropriate components for a fixed automatic gun, it’s also essential to choose high-quality consumables — nozzles, contact tips and gas diffusers. This helps minimize downtime for frequent changeovers and supports production goals. They can also reduce quality issues that could require rework later in the welding operation. Consumables are available that can be used across different types of welding guns, including semi-automatic ones and fixed automatic guns. This compatibility can be beneficial to simplifying inventory and preventing errors when installing new consumables on either type of gun. Robotic MIG welding guns and consumables are an important part of the welding operation yet are frequently overlooked when investing in robotic welding systems. Companies may often choose the least expensive option when, in reality, purchasing quality robotic MIG guns and consumables can lead to significant cost savings in the long run. There are many other common misconceptions about robotic MIG guns and consumables that, if corrected, can help increase productivity and decrease downtime for the entire welding operation. Here are five common misconceptions about MIG guns and consumables that may be affecting your robotic weld cell.
For many fabricators, the choice between an air-cooled and water-cooled robotic MIG welding gun is easy. Their heavy-duty applications simply demand a water-cooled model due to the high amperage and duty cycle requirements of the job — an air-cooled gun would overheat and fail prematurely under such conditions. In the right application, a water-cooled robotic MIG gun can often prove beneficial by minimizing downtime, increasing productivity and reducing consumable costs. These guns typically have higher duty cycles than air-cooled models and operate at higher amperages, which means they can run for longer periods of time. Still, deciding whether an operation would benefit from converting to a water-cooled MIG gun involves a careful analysis of several factors. In addition to considering the amperage requirements and duty cycle, a fabricator should consider the upfront costs, potential return on investment (ROI) and the specific application. For example, some fabricators may choose a water-cooled robotic MIG gun because of the length of their welds — they need a long arc-on time to produce long welds, which generates more heat in the gun. Similarly, critical start-and-stop points along a longer weld joint typically require a gun that can handle extended weld times. The weld joint design and type or thickness of the material can also help determine whether to switch to a water-cooled MIG gun. For instance, heavy plate sections that have been preheated can generate substantial radiant heat that impacts how well a gun cools, and can adversely affect the life of the front-end consumables. In this scenario, a water-cooled gun would be better suited for the job. When deciding whether a water-cooled robotic MIG gun is the best choice for an application, it’s important to keep in mind some maintenance and replacement costs. While a water-cooled gun costs more upfront, there is the possibility to conduct maintenance on each individual component within the cable assembly (e.g. water lines, gas hose, etc). However, an air-cooled cable combines all its components into one common part and if any single component fails, the entire cable needs to be replaced, resulting in higher replacement costs. It is necessary to weigh those factors against each other. Welding guns — whether air or water-cooled — must stay cool to protect the power cable, gun body, neck and consumables from heat damage during welding. That heat takes three forms: radiant heat from the arc; resistive heat from the electrical components in the welding circuit; and reflective heat from the welded part, particularly aluminum or preheated parts. Whereas an air-cooled MIG gun relies on the ambient air, shielding gas and arc-off time to dissipate heat, a traditional water-cooled robotic MIG gun circulates a coolant from a radiator unit through cooling hoses inside the power cable and into the gun body and neck. The coolant then returns to the radiator, where the radiator’s baffling system releases the heat absorbed by the coolant. There are also guns available on the market today that cool only the front of the gun, where heat is generated, and still use an air-cooled cable. Air-cooled MIG guns also use much thicker copper cables and inner neck tubes, whereas water-cooled robotic MIG guns use much less copper in the power cables and thinner wall sections in the necks because the coolant carries away the resistive heat before it builds. Water-cooled MIG guns, however, do have multiple inner lines that run through the neck to the front-end consumables, making this portion of the gun heavier than an air-cooled neck. There are three key indicators that signify a welding operation could benefit from converting to a water-cooled MIG gun: 1. Excessive consumable usage All these factors are interconnected, because if the weld is too hot, excessive consumable usage and gun temperature will automatically result. In general, water-cooled robotic MIG guns are most beneficial for high-amperage applications and are typically available in 350 to 600 amp models. Closely related to amperage is duty cycle, which refers to the amount of time during a 10-minute cycle that the gun can operate at its rated capacity without overheating. Water-cooled robotic MIG guns have varying duty cycle capacities depending on the manufacturer and model. It is important to make the appropriate comparison during the selection process, as some guns may be rated at either 60% or 100% duty cycle, which results in different amperage ratings. Fabricators who plan to change from an air-cooled to a water-cooled robotic MIG gun should follow these three steps to help ensure a smooth conversion. Match the existing tool center point (TCP) and approach angle. Be sure to have access to all the weld joints with the new water-cooled MIG gun. Make sure that the tooling will work with the new system. The gun may require a special neck or special mounting arm to achieve the desired TCP. Often, converting to a water-cooled gun will require a new mounting arm and insulating disk to maintain or achieve a specific TCP while changing the dimensions of the neck itself to create better access. Ensure overall clearance. A 3-D simulator can help determine whether all parts of the new system will clear all tooling or any other obstructions. In addition to having front-end clearance and access – once installed, it’s important that the gun body and cable bundle fits properly to avoid getting caught on tooling or other equipment. Get a water cooler. It is necessary to invest in a radiator for the new water-cooled robotic MIG gun. Ensure that the water-cooler has been installed and maintained, as per the manufacturer’s specifications. Because all the lines and hoses in a water-cooled robotic MIG gun are separate, it is possible to conduct maintenance on individual components if they become damaged. However, due to the lines being internal to the gun, it is difficult to perform preventive maintenance on them. There are options though to care for a water-cooled gun. As with an air-cooled MIG gun, it’s important to inspect a water-cooled robotic MIG gun to ensure that all consumables and connections are tight and working properly. Inspect the water lines frequently to make sure they are tight and have no leaks, and replace the O-rings when necessary (e.g. when cracks or wear appears). Ensure there is a flow switch installed in the return line from the gun and the radiator to indicate any leaks within the system — this component will save time and money in the event of a failure. Using a reamer or nozzle cleaning station adds significant benefits to the preventive maintenance of water-cooled robotic MIG guns. A reamer eliminates the need to manually clean out the front-end consumables and can, with the addition of an automated sprayer, add anti-spatter compound to help further extend consumable life. This feature adds to the overall cost of the equipment, but it helps increase uptime for production since there is less manual intervention. The ROI is typically worth it. It is important to always use the correct coolant — do not fall prey to the notion that it is cheaper to use tap water in a water-cooled gun. Doing so can cause algae growth or mineral build-up and, eventually, lead to costly clogging. Instead, use deionized water or the specially treated coolant solution recommended by the manufacturer. These coolants contain special additives to lubricate internal pumps and O-rings, as well as to prevent algae growth. Although converting to a water-cooled robotic MIG gun is often more of a necessity than a choice (because the application demands it), this type of gun has its value. Applying a water-cooled gun to the appropriate application can result in a more efficient system performance and lower overall operating costs. Consider the various costs, specific application needs and joint accessibility to determine whether a water-cooled robotic MIG gun is the best option for the specific robotic application — and don’t hesitate to consult a trusted welding distributor, welding equipment manufacturer or robotic welding system integrator with questions.
A robotic MIG welding system contains many components that impact the quality of the parts it welds, its productivity and the overall operational costs. Among those, the robotic MIG gun neck plays a larger role than may first be apparent. Why? The durability of the gun neck — and especially its ability to withstand impacts — is important for maintaining tool center point (TCP). An accurate TCP provides consistency and repeatability from part to part, and is key to the system’s ability to maintain weld positions, especially in assembly line welding where new parts are continually entering the weld cell. A productive and efficient robotic welding system places welds in the same place every time. To achieve this, the MIG gun neck needs to stay in its expected position. A weak neck that easily bends during routine welding can lead to TCP problems over time, as can rough handling of the neck during consumable changeover. Issues with TCP can lead to additional spatter or missed welds, causing rework or scrapped parts. These cost time and money in lost productivity and in wasted parts. An inaccurate TCP can also cause the neck to crash into parts or tooling, potentially leading to damage and unplanned downtime. When selecting a robotic MIG gun neck, look for durable, high quality materials and robust construction. The goal is to have a neck that is strong enough to withstand minor crashes without bending. In addition, be certain there is a solid connection from the neck to the gun, and from the gun to the mounting arm in a conventional system or to the robot itself in a through-arm system. Any play in the system can negatively impact TCP. Neck durability varies, depending on if the application uses an air-cooled or a water-cooled robotic MIG gun. Some applications require water-cooled guns to protect the gun and the neck in high-temperature continuous welding; however, these guns tend to be less durable in a crash than air-cooled gun necks due to the internal soldering of copper and brass lines for the water passages. Air-cooled guns typically feature copper tubes covered with insulation and aluminum, making them stronger and more able to resist an impact. Some manufacturers offer a hybrid air/water-cooled robotic MIG gun, in which the water lines run external to the neck. This type of gun tends to have a stronger neck, like an air-cooled gun, which makes it more tolerant to crashes. However, it is important to ensure the water lines do not hit tooling or parts, which can negatively affect TCP or create leaks. Some key best practices can help protect the neck and provide consistent TCP. 1. All robotic welding systems require a form of collision detection to prevent damage to both the robotic MIG gun and the robot arm in the event of an impact. Some robotic systems incorporate robot collision detection software. Systems that do not have built-in collision detection should always be paired with a clutch — an electronic component that attaches to the gun to protect it and the robot from heavy damage in the event of a collision. 2. Another key peripheral is a neck inspection fixture, which verifies that the gun’s neck is set to the intended TCP and allows the neck to be readjusted after a collision or if it becomes bent during routine welding. If neck adjustment is needed, the welding operator simply adjusts the neck to meet the proper specifications. This prevents costly rework due to missed weld joints and can reduce downtime to reprogram the robot to meet the welding specifications with a bent neck. 3. Having spare necks ready helps gets the system back online quickly. The welding operator need only remove the bent neck in the event of a crash and exchange it with a spare one. The damaged neck can be set aside for inspection later, minimizing interruption to the weld cycle. 4. Choose a high-quality reamer to avoid potential damage to the gun or neck. A reamer, or nozzle cleaning station, removes spatter from the nozzle and clears away the debris that accumulates in the diffuser during welding. A high-quality reamer securely holds the gun in place during the ream cycle, which reduces the risk of bending the neck and compromising TCP. 5. Proper neck and consumable installation and ongoing maintenance are important. Make sure to tighten these components to factory specifications. When changing consumables, remove them with the right tools to avoid bending the gun neck. In many cases, a robotic welding system can provide a competitive edge — offering greater productivity, quality and cost savings. Take care to protect the MIG gun neck, and follow best practices for setup and maintenance, to help ensure the system maintains optimal TCP and the operation experiences minimal downtime.
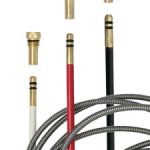
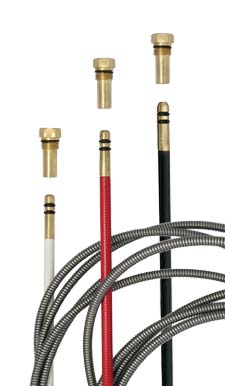
The liners used in a robotic gas metal arc welding (GMAW) gun play a significant role in the productivity, cost and quality in your automated welding operation, alongside other consumables such as the nozzle, retaining head (or gas diffuser) and contact tip. Liners run the length of the robotic welding gun and power cable — from the contact tip to the power pin — and act as the conduit through which the wire is fed. A poorly installed liner can lead to problems with bird-nesting and excessive debris in the liner, which can both cause wire feeding issues that lead to downtime — the enemy of any robotic welding operation. For this reason, it is imperative to select the right liner for the wire type and diameter being used and to trim it to the proper length.
In robotic MIG welding applications, minimizing downtime is key. It reduces costs and improves efficiencies to help an operation meet its production goals. Gaining the best performance, in part, depends on the equipment being used. Having the right robotic MIG gun and power cable, for example, is critical. There are several factors to consider when determining the right gun style and cable length for the application. Prioritizing these are important, as using the wrong length cable can cause problems ranging from premature cable failure to poor wire feeding. Before selecting the power cable length, first consider whether a conventional gun or a through-arm robotic gun is best-suited for the application. Each style has its advantages and limitations. Through-arm robotic welding systems have become more common, as more equipment manufacturers develop this style compared to conventional robots. Through-arm robotic welding systems, however, allow for the mounting of either a through-arm gun or a conventional one. In some applications, the latter is the better choice. When choosing between the two, consider the available space and weld cell layout, joint access and the type of material being welded. Conventional guns can often access joints better and/or maneuver around tooling or fixturing that a through-arm gun can’t reach. Conventional guns can also be less expensive and faster to install, although they do require proper cable management. They also require more space, so they aren’t typically the best choice in smaller weld cells. Through-arm guns work well in applications where deep access to the part or fixture is necessary. Since they don’t have a mounting arm and take up less space, they also offer advantages in smaller weld cells. The design of the gun —with the power cable assembly running through the arm of the robot —manages excess cable slack, which typically helps them last longer than a conventional power cable. Selecting the proper cable length is critical for both types of guns and numerous factors impact the choice. These include wire feeder, the make and model of the robot, and robot articulation. Having the right cable length helps prevent problems with wire feeding that can lead to downtime and unnecessary labor and/or part costs to address the issue. The wrong cable can further increase costs and downtime due to premature cable failure. When using a conventional gun, a cable that is too short causes tension, which can result in components prematurely breaking down in the cable assembly. It can also cause the clutch or the robot to overload, which will send a collision detection signal that stops the robot — resulting in unnecessary downtime. A cable that is too long is also a problem, because it can get caught on tooling or result in extra weight that bogs down the mounting arm – potentially overloading the clutch. With a through-arm gun, a too-short cable with visible tension also causes problems. Choose a cable that allows some slack for the robot arm to move around. But remember, too much slack can be as problematic as too little slack. When choosing proper cable length for a through-arm gun, it’s important to know the robot make and model, the feeder make and model, and the measurements of the system. If any nonstandard equipment or tooling is mounted to the face of the robot, such as a gripper or a camera, this changes the thickness of the plate and therefore impacts the necessary cable length, requiring it to be longer. It is also important to know where the wire feeder is mounted relative to the robot casting to ensure proper cable length. Much of the same information is needed in choosing the right cable length for a conventional gun: robot make and model, feeder make and model. In addition, consider where the feeder is mounted on the robot or even remotely, as both will affect cable length. For both types of guns, the feeder should be adjusted each time the cable is replaced to manage cable slack properly. Failing to properly adjust the wire feeder can result in a cable that is too tight or long for the given application, causing premature failure and potential damage to the robot or wire feeder. Fixing these issues at the start of the process can help avoid much greater downtime and costs later. Following some best practices can help extend power cable life, reduce downtime and improve productivity. Many of the best practices are related to the programming of the automated welding system. Oftentimes, cables fail because they were set up to fail — the system is asking too much of the cable. Make sure the robot doesn’t articulate too far in either direction, to avoid placing excess stress on the cable, whether it is a conventional or through-arm robotic gun. It’s also important to limit the movements of axis five (bending) and axis six (rotation) to help extend cable life. The joints of the robot get smaller as they move from the base to the wrist. Use the larger joints nearer to the base as much as possible and rely on the smaller joints only when necessary to reach the weldment. In addition, employ a cable management system when using a conventional gun to ensure there isn’t too much slack in the cable. With too much slack, the cable will rub on anything around it and possibly catch on fixturing. When a robot moves at production speed, it can break the cable or fixture. Cable management systems can take the form of a recoil with an adjustment knob and pulley that allows the maintenance personnel or welding operator to adjust the position (length) and tension of the power cable. When using a through-arm gun, choose a rotating power cable connection to reduce the stress on the system. Conventional style unicables typically come with a crimped or solid connection, which limits rotational capabilities and produces torsional stress on the cable. Unlike conventional unicables, a power cable that incorporates a rotating power connection allows for stress-free rotation — and can ensure a longer cable life. Without the right equipment — and proper system programming — downtime can cost significant time and money in robotic welding applications. Take care upfront to choose the right equipment, including the gun and power cable, to save time and money in the long run and keep the operation running smoothly.
Through-arm robotic welding systems are becoming increasingly common in the industry, as more equipment manufacturers turn to the development of this style compared to conventional robots. However, there are some applications where it is better to use a conventional robotic gun for these systems, instead of the through-arm gun typically chosen. The good news is that most through-arm robotic welding systems allow for mounting either type of gun — providing more options and flexibility depending upon the needs of the application. And while the choice of gun is sometimes an afterthought, it can significantly impact efficiency, throughput and quality of the finished weld. Choosing the best option for the job up front is key. As the name suggests, the power cable assembly of a through-arm MIG gun runs through the arm of the robot as opposed to over the top of it like in a conventional gun. Because of this design, the through-arm gun style is often more durable, since the power cable is protected. However, because conventional guns can be used on either type of system — a through-arm robotic system or a conventional robot — they can sometimes offer greater flexibility, and can be used with more robot makes and models. There are numerous factors to consider when making the choice between a through-arm gun and a conventional robotic gun for a through-arm robotic welding system: Conventional style guns, which typically offer a longer neck, can provide more flexibility in accessing or reaching certain weldments, whereas through-arm guns may have difficulty reaching around fixturing or tooling in some cases. In applications where a through-arm gun is installed and it doesn’t reach the weldment as needed, a conventional gun can be swapped in for access purposes. In addition, conventional guns are often a good choice in smaller, more modular weld cells that feature short-armed robots. Through-arm guns may not work as well in these situations because there is not as much cable, and therefore the robot doesn’t have as much slack for articulation. Also, because of the way the cable lies in a conventional gun, the bend radiuses of the cable are much larger than in through-arm guns. When welding aluminum, for example, wire feeding is a major contributing factor to poor weld quality, and therefore tight bend radiuses are not recommended. This makes conventional guns a good option when robotic welding aluminum. Uptime and throughput are also critical in robotic welding applications, and maintenance is a key factor that impacts productivity, downtime and costs. Conventional guns often provide easier maintenance because everything is outside of the arm, allowing for parts to be changed or repaired quickly to minimize downtime. Another benefit of conventional guns is they tend to be more cost-effective to purchase and can be installed much faster — saving time and money in setup. Through-arm guns provide their own advantages when matched with a through-arm robotic welding system. In applications that require plunging deeply into a fixture or part, a through-arm gun is often a better choice. Think of a through-arm gun as an extension of the robot arm. This extension allows it to access different areas within the part being welded, depending on the application. In addition, because the cables are more protected on a through-arm gun they tend to last longer overall, which helps reduce replacement costs. The through-arm design naturally protects the power cable and makes it less prone to snagging on fixturing, rubbing against the robot or wearing out from routine torsion. With either a conventional gun or a through-arm gun, there are some common best practices that can contribute to success in robotic MIG welding. First, it is critical that the cable is never under tension when using a through-arm gun, to help prevent premature cable failure. Cable tension is visible on a conventional style gun but not on a through-arm gun since the cable runs through the gun. This makes proper setup especially important with through-arm guns. In addition, it’s best to use a cable management system when using a conventional gun to ensure there isn’t too much slack in the cable. With too much slack, the cable will rub on anything around it and possibly catch on fixturing. When a robot moves at production speed, it can break the cable or fixture. Keep these factors in mind, along with joint access requirements and weld cell layout, when making the gun choice to help improve throughput and productivity.
As companies seek to gain a competitive edge, it’s not surprising that some turn to welding automation. It offers numerous advantages, including greater productivity, improved quality and cost savings compared to a semi-automatic welding operation. However, to gain the most out of the investment it’s important to follow some best practices in the weld cell. These considerations include the careful selection, installation and maintenance of gas metal arc welding (GMAW) guns. As with any type of welding equipment, the goal is to implement the GMAW gun in a manner that optimizes performance, reduces downtime and prevents the accrual of unnecessary costs. It is important to note that the considerations for achieving these benefits may vary depending on whether the robotic welding system uses a through-arm gun or a conventional-style gun. Following are some tips to help. All automated welding systems need some form of collision detection to minimize damage to the robot and the GMAW gun in the event of an impact. Today’s robots typically have built-in collision detection software, making it appropriate to use only a solid gun mount to connect and position the GMAW gun. In some cases, companies like the secondary insurance of using a clutch on robots featuring this software. Doing so, however, can add unnecessarily to the expense of the operation, increase weight on the front end of the robot arm and cause the tool center point (TCP) to be less repeatable. When possible, it is preferable to use a solid mount coupled with collision detection built into the robot, instead of a clutch. Solid mounts offer numerous advantages, especially for systems using a through-arm style gun. A solid mount can aid in achieving a more accurate TCP, providing greater repeatability for more consistent welds. They are also more cost effective and lighter weight, which allows for quicker movement and potentially better productivity. The use of a solid mount, in conjunction with a through-arm robotic GMAW gun, typically opens up the work envelope, so the robot arm can better access the weld joint. For systems with a conventional gun, a solid mount provides little benefit over a clutch in terms of opening up the work envelope or increasing productivity due to the position of the gun in comparison to the faceplate of the robot. Air blast is an optional technology on GMAW guns that can help enhance gun performance. This feature can be factory-installed or retrofitted into a gun. Utilizing air blast when possible helps eliminate debris in the front part of the robotic GMAW gun, reducing opportunities for weld contamination that can lead to poor weld quality, costly rework and downtime. As the name implies, the air blast feature blows compressed air through the front of the gun to remove debris. It can be used with air-cooled robotic guns or water-cooled models. In addition to removing debris that can cause poor weld quality or contamination, air blast can help increase the time between cycles by removing spatter from the front of the gun. The air blast function can also be used to cool down the gun between weld passes, to help operations avoid going over the duty cycle limit when using air-cooled guns. Using simulation software to model the proposed weld cycle before selecting and implementing a robotic GMAW gun can help in achieving the best results with an automated welding system. While the goal with an automated welding system is often to move as quickly and freely as possible, it’s important to remember that it’s typically best to limit excessive robot movements, as it results in longer gun life thanks to reduced equipment stress. Simulation programs can be used to determine proper system setup, including TCP requirements and which nozzle and GMAW gun neck are best suited to get the desired joint access or angle. The reach and access of the gun neck, in particular, is an important factor in system movement and stress. Changing the neck angle from 22 degrees to 45 degrees, for example, can have a significant impact on robot articulation. This is where a simulation program is beneficial, since it can be used to determine the type of neck and the neck angle that are best for the application before making the investment. To gain optimum speed and performance from the gun, it may be as simple as slightly adjusting the height of the risers or tooling to gain better access to the weld and reduce stress on the gun. Among several peripherals that can be added to maximize system performance, a neck inspection fixture is one that can help improve throughput, minimize unnecessary downtime — and help gain the best performance from the robotic GMAW gun. A neck inspection fixture verifies that the gun neck is set to the intended TCP and allows the neck to be readjusted after a collision or if it becomes bent during routine welding. When neck adjustment is needed, the welding operator can simply adjust the neck to meet specifications. This helps prevent costly rework due to missed weld joints and can prevent the downtime it takes to reprogram the robot to meet the necessary welding specifications with a bent neck on the gun. In some cases, the welding operator can simply remove the bent neck and exchange it with a spare neck to get the system back online quickly. The damaged neck can be set aside for inspection later, resulting in less interruption to the weld cycle. Using a neck inspection fixture from day one of an automated welding system helps ensure a consistent TCP. Choosing the right gun and cable for the application — and installing them properly — are key steps toward maximizing performance of the robotic GMAW gun. Consider the weld length, the required amperage and the type and thickness of material being welded when selecting a robotic GMAW gun. Air-cooled guns work well on lower amperage applications and high-volume welds. In heavy equipment manufacturing and similar industries, a water-cooled GMAW gun may be necessary to weld on thicker materials for longer periods of time. Water-cooled guns offer high amperages — usually up to 600 amps — at 100 percent duty cycle. Selecting the appropriate neck, power cable and other gun components can also have an impact on productivity and performance. Choosing the proper neck style and length for the application provides the gun with easy and complete access to the weld joint, which helps reduce weld defects and downtime for rework. Available neck angles typically range from 180 to 45 degrees, with varying lengths to accommodate most robotic welding applications. Necks can also be special ordered for custom TCP requirements when necessary. In addition, power cable style and length can also impact efficiency in robotic welding operations. For through-arm applications, the power cable is often sold in set lengths to match a specific model of robot, so the selection process is easier. For conventional style robots, it’s important to verify the exact length needed. Too long of a cable can easily kink or move during the welding process, while too short of a cable can stretch and shorten cable life. In both cases, it can result in downtime, premature cable failure and increased costs. Also, look for a sturdy power cable that can withstand UV damage from the arc and resist wear. Cables with quick-change features can extend cable life, simplify cable changeover and maximize arc-on time when installed properly. Regularly check all connections on the GMAW gun to ensure they are tight and secure. Doing so helps prevent issues that can lead to weld defect and downtime. Tighten front-end consumables and check that all seals are in good condition. Also be certain the power pin is secure. While checking that welding cable leads are secure, look for signs of wear and replace them as necessary. Remove spatter from the GMAW gun nozzle regularly, ideally applying anti-spatter to protect against buildup. Implement a reamer when possible to minimize damage to the gun and front-end consumables. A reamer (or nozzle cleaning station) removes spatter from the nozzle bore and clears away debris that accumulates around the diffuser during welding, resulting in longer life of the consumables and higher weld quality. The reamer can be programmed to run between welding cycles — either during part loading or transfer — so it does not add to the overall cycle time per part. In addition, track the life span of the GMAW gun liner and replace it prior to failure. Replacement liners should be trimmed to the appropriate length using a liner gauge. Automated welding operations that are larger in size may need to do more frequent preventive maintenance. It’s especially important for companies that complete large weldments on thick materials because they stand to have greater costs and downtime for rework in the event of gun failure. Automated welding systems add speed, accuracy and repeatability to the welding operation. They can help companies increase productivity and reduce costs in a relatively short period. Implementing some best practices can help companies extend the life of the GMAW gun and consumables, and optimize performance and efficiency of an automated welding system — offering them the most out of the investment.
In recent years, the industry has seen advancements in robotic welding technologies that help companies improve productivity and quality and gain a competitive edge. The transition from conventional robots to through-arm robots is among those advancements. These robots require the use of through-arm robotic MIG guns. As the name suggests, the cable assembly of a through-arm MIG gun runs through the arm of the robot, improving its overall durability. The through-arm design naturally protects the power cable and makes it less prone to snag on fixturing, rub against the robot or wear out from routine torsion — all of which can lead to premature cable failure. Since through-arm robotic MIG guns don’t require a mounting arm like conventional robotic MIG guns do, they provide a smaller work envelope. This makes them particularly advantageous when working in tight spaces. Here are the top 10 things to consider when selecting, installing and maintaining a through-arm robotic MIG gun: When choosing a through-arm robotic MIG gun, look for one that offers good power cable rotation. For example, some manufacturers place a rotating power connection on the front of the cable that allows it to rotate 360 degrees. This ability provides stress relief for the cable and power pin, and allows for greater maneuverability for a wider range of applications. It also helps prevent cable kinking that could lead to poor wire feeding, conductivity issues, or premature wear or failure. Choosing a through-arm robotic MIG gun is similar to choosing a conventional robotic MIG gun, except that through-arm guns are sold with predetermined cable lengths. It is still important, however, to choose a gun with power cables that are constructed of durable components and materials to help prevent wear or failure. Always know your robot make and model when placing an order for a new gun to ensure you make the proper selection. Always select the proper amperage of gun and be certain it has the appropriate duty cycle for the given application. Duty cycle is the amount of arc-on time within a 10-minute period; a gun with a 60 percent duty cycle, for example, can weld for six minutes within that period without overheating. As a rule, most manufacturers offer guns up to 500 amps, in both air- and water-cooled models. Check if the robot that the through-arm gun is installed on has collision detection software. If not, identify a clutch that will pair with the gun to help ensure the robot remains safe if it collides with a workpiece or tooling. For through-arm robotic MIG guns, it is important to note that the power cable needs to be installed in a slightly different manner than a conventional over-the-arm robotic MIG gun. Installing a through-arm robotic MIG gun incorrectly can lead to a host of problems, not the least of which is cable failure. Incorrect installation can also cause weld quality issues, such as porosity, due to poor electrical connections; premature consumable failure caused by poor conductivity and/or burnbacks; and, potentially, failure of the entire robotic MIG gun. To prevent such problems, it is imperative to consult the manufacturer’s instructions for each specific MIG gun. When installing a through-arm robotic MIG gun, first position the robot with the wrist and top axis at 180 degrees, parallel to each other. Install the insulating disc and spacer the same as with a conventional over-the-arm robotic MIG gun. Be certain that the power cable position is also correct. The cable should have the proper “lie” with the robot’s top axis at 180 degrees. In addition, it’s important to avoid a very taut power cable, as it can cause undue stress on the power pin. It can also cause damage to the cable once the welding current passes through it. For that reason, it’s important to make sure the power cable has approximately 1.5 inches of slack when installing it. (See Figure 1.) The stud on the front of the power cable needs to be fully inserted into the front connector of the through-arm robotic MIG gun. To achieve this result, always install the stud into the front housing prior to bolting the front end onto the robot wrist. By pulling the cable through the wrist and making the connections in front of the gun, it’s easy to slide the whole assembly back (once the cable is fastened) and bolt it onto the wrist. This extra step will ensure the cable is seated and will allow for maximum continuity and maximum power cable life. Be certain to position the wire feeder in close enough proximity to the robot that the power cable on the through-arm robotic MIG gun will not be stretched unnecessarily after installation. Having a wire feeder that is too far away for the length of the power cable can cause undue stress on the cable and front-end components. Consistent preventive maintenance is key to the longevity of any robotic MIG gun, including the through-arm style. During routine pauses in production, check for clean, secure connections between the MIG gun neck, the diffuser or retaining heads, and the contact tip. Also, check that the nozzle is secure and any seals around it are in good condition. Having tight connections from the neck through the contact tip helps ensure a solid electrical flow throughout the gun and minimizes heat buildup that could cause premature failure, poor arc stability, quality issues and/or rework. In addition, regularly check that the welding cable leads are secured properly and assess the condition of the welding cable on the robotic MIG gun, looking for signs of wear, including small cracks or tears, and replace as necessary. Spatter buildup can cause excessive heat in the consumables and MIG guns, and block shielding gas flow. Visually inspect consumables and the through-arm robotic MIG gun on a regular basis for signs of spatter. Clean the gun as needed and replace consumables as necessary. Adding a nozzle cleaning station (also called a reamer or spatter cleaner) to the weld cell can also help. Like its name implies, a nozzle cleaning station removes spatter (and other debris) that builds up in the nozzle and diffuser. Using this equipment in conjunction with a sprayer that applies an anti-spatter compound can further protect against spatter accumulation on the consumables and the through-arm robotic MIG gun.
As companies seek out means to increase productivity and improve quality, the investment in welding automation continues to grow across the fabrication and manufacturing industries. Along with providing greater efficiencies, robotic welding systems allow companies to streamline their operations to gain cost savings and to position themselves favorably among the competition. Selecting the right robot and power source, and ensuring that the parts to be welded lend themselves to automation — namely that they are repeatable and offer joint accessibility — are all vital to success. There are also steps that companies can take to optimize the robotic welding process by way of the robotic gas metal arc welding (GMAW) gun. From making the proper selection for the application to implementing appropriate preventive maintenance and more, this component can help support greater arc-on time, reduce costs and help companies realize the benefits of welding automation. Determining the right robotic GMAW gun depends on the application, including the type and thickness of material being welded, the length of the weld and the amperage required. The type of robotic welding system also factors into the decision, as through-arm robots are becoming more prevalent in the industry and replacing many conventional robots due to their ability to reduce cable wear from routine torsion. In this case, a through-arm robotic GMAW gun, in which the cable assembly runs through the arm of the robot (as opposed to over it), is necessary. As with conventional GMAW guns, through-arm style guns are available in air- or water-cooled varieties. In most applications, air-cooled GMAW guns provide the necessary cooling capacity to protect against premature failure and offer good performance. These guns rely on both the copper in the unicable and the ambient air for cooling. In addition to working well on lower amperage applications, for welding materials up to 0.16-inch thick and for short, high-volume welds, air-cooled GMAW guns are also quite sturdy. In heavy equipment manufacturing and similar industries, water-cooled robotic GMAW guns are often chosen due to their ability to weld on thicker materials (over 1/4 inch) for longer periods of time. While more expensive up front and more to maintain, these guns offer high amperages (usually 300 to 600 amps) at 100 percent duty cycle, which makes them well suited for long weldments. These GMAW guns operate by circulating coolant from a radiator unit through the power cable via cooling hoses and through the gun and neck. This coolant returns to the radiator where it releases the heat that it absorbed during the welding process. Because of the water circuit, there is the potential for leaks so companies should take care to implement a preventive maintenance schedule to help protect against issues. In the event that a company welds materials of a variety of thicknesses at low and high amperages, a good choice for a GMAW gun is a hybrid variety featuring a durable air-cooled neck with external water lines. The neck, power cable and other components chosen for a robotic GMAW gun can have a measurable impact on welding performance and productivity. The goal with each of these items is to keep them functioning correctly and prevent premature failure so that the robot can maintain the high levels of arc-on time it was designed to provide. It is important that the robotic GMAW gun is able to access the weld joint accurately and fully, and utilizing the proper neck style and length for the job is key. Typically, GMAW gun manufacturers offer necks in multiple angles ranging from 22 to 180 degrees, and in various lengths to accommodate most robotic welding applications. In some cases, however, it may be necessary to special-order a neck. Whichever the case, having a neck that can reach the weld joint appropriately can reduce weld defects by completing the weld properly the first time, and eliminate downtime for rework. The right power cable style and length on a robotic GMAW can also help companies achieve efficiencies in the robotic welding operation. In a through-arm robotic application, the selection is simpler, as the power cable is typically sold in set lengths to match a specific make and model of robot. Still, companies may want to consider additional options for these components, such as power cables with a rotating connection. This feature helps relieve stress on the cable and power pin, resulting in less kinking and a longer life. For conventional robots, selecting the correct length of power cable is important — too long of a cable can easily kink or whip around during the welding process, whereas too short of a cable can stretch and wear more quickly. Both can result in premature cable failure, and downtime and costs for cable replacement. When in doubt about the selection, contact a trusted robotic integrator, robotic GMAW gun manufacturer or welding distributor for assistance. Companies should also look for sturdy power cables that are able to withstand UV damage from the arc and resist wear, as well as those with quick-change features to further extend cable life, simplify changeover and prevent interruptions to the welding process. Using high-quality consumables — nozzles, contact tips and gas diffusers — is another way to improve the robotic welding operation and protect the robotic GMAW gun. For higher-amperage applications, companies may want to consider a chrome zirconium contact tip to withstand the higher heat levels. The connections between consumables should always be tight to prevent electrical resistance that could lead to failure and to gain good conductivity for a smooth and stable arc. When possible, adding a nozzle cleaning station or reamer to the robotic weld cell can further optimize the performance of the consumables and the robotic GMAW gun by ensuring that the nozzle is free of spatter and able to direct the shielding gas to the weld pool to protect the weld. It can also help minimize the risk of the consumables overheating. In certain instances, companies may reprogram the robot after a collision in order to re-establish tool center point (TCP) with a bent robotic GMAW gun neck. As an alternative, a neck checking fixture (or neck inspection fixture) can adjust the neck back to the correct TCP to help improve the performance of the gun and gain greater arc-on time. The neck checking fixture tests the neck profile to ensure that the contact tip will meet the TCP. If the tool point is off because of an impact or other problem, it readjusts the neck back to the correct position. This peripheral can also be used to inspect a new robotic GMAW gun neck prior to installation to ensure it is accurate. For companies that maintain a large number of robotic welding cells, a neck checking fixture can reduce downtime and costs when exchanging necks from one robotic GMAW gun to another — welding operators need only to remove the damaged or bent neck and replace it with a spare one that has been inspected already to get the robot back to welding immediately. The damaged neck can then be set aside for adjustments while the robot is already online. For newer robots with more sophisticated collision detection software, using a solid mount to protect the gun in the event of an impact can also help maintain a more accurate TCP than a clutch mount. Unlike a clutch mount that is designed to move, these durable, high-strength mounts offer greater repeatability for higher weld quality. They are also less expensive. To help maintain accuracy, quality and speed in the robotic welding operation, additions to the robotic GMAW gun like air blast and wire brake features are beneficial. An option for both air- and water-cooled robotic GMAW guns, the air blast feature forces high-pressure air through the front of the gun to help remove debris that could enter the weld pool and negatively affect weld quality. Welding operators can program the air blast feature to operate between weld cycles to reduce unnecessary downtime. Another option for robotic GMAW guns to help optimize welding performance is the addition of a wire brake feature. As its name implies, a wire brake prevents wire feeding when welding stops. The result is a consistent wire extension at the beginning of every weld, a factor that especially complements robots using touch-sensing software — the wire brake keeps the wire in position as the robot searches for the weld joint location. This optional robotic GMAW gun feature also keeps the wire from unspooling during arc starting and stops. Preventive maintenance (PM) is critical for gaining optimal performance from a robotic GMAW gun, whether it is air- or water-cooled or a conventional or through-arm style. Recommend PM activities include: The frequency of the PM schedule will depend on the size of the robotic welding operation and the application. Companies with large weldments on thick materials stand to have greater costs and downtime for rework should the gun fail and cause a quality issue. Maintaining the robotic GMAW gun more frequently is advised.
Animation | Tregaskiss QUICK LOAD Liner AutoLength System
Tregaskiss QUICK LOAD Liner AutoLength System Animation
Animation | TOUGH GUN TA3 Robotic Air-Cooled MIG Welding Guns
TOUGH GUN TA3 Robotic Air-Cooled MIG Welding Guns Animation
Animation | Tregaskiss Fixed Automatic MIG Guns
Tregaskiss Fixed Automatic MIG Guns Animation
Video | Tregaskiss Fixed Automatic MIG Guns
Tregaskiss Fixed Automatic MIG Guns
Animation | Tregaskiss TOUGH GUN Reamer Robotic Nozzle Cleaning Stations
Tregaskiss TOUGH GUN Reamer Robotic Nozzle Cleaning Stations Animation
Video | Tregaskiss TOUGH GUN Reamer Robotic Nozzle Cleaning Stations
Tregaskiss TOUGH GUN Reamer Robotic Nozzle Cleaning Stations
Video | Tregaskiss AccuLock R Consumables for Better Throughput
Tregaskiss AccuLock R Consumables for Better Throughput
Video | Tregaskiss AccuLock HDP Contact Tips
Tregaskiss AccuLock HDP Contact Tips
Animation | Tregaskiss AccuLock R Consumables
Tregaskiss AccuLock R Consumables Animation
Video | Configure your Tregaskiss Robotic MIG Gun and Reamer Online
Configure your Tregaskiss Robotic MIG Gun and Reamer Online
Selecting Contact Tips for Robotic Welding
Selecting Contact Tips for Robotic Welding
The job of the contact tip is to transfer the welding current to the arc and guide the welding wire as consistently as possible. If either of these two factors degrade, the overall welding process also degrades, affecting quality.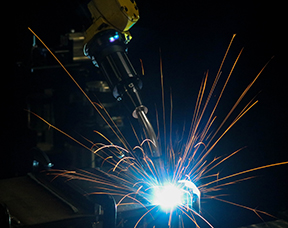
fuse in the fuse box that is your robotic
welding cell. But this small fuse can have
a big impact on productivity.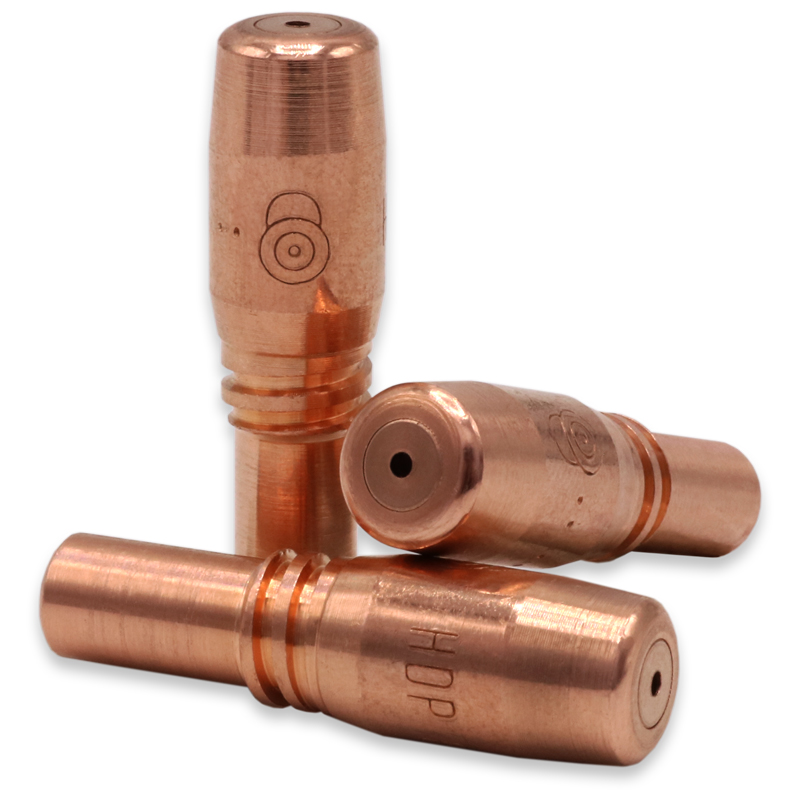
Once you understand the types of contact tips available, there are numerous factors to consider when choosing the right tip for your application. Here are some common mistakes operations make when choosing contact tips so you can avoid the same pitfalls:
If contact tips are being removed proactively even when there is no keyholing, burnbacks or erratic arcs, there could be potential to get more life out of contact tips.
It’s important to look beyond the purchase cost and consider the big picture to best evaluate the potential productivity, as well as weld quality and efficiency gains of certain contact tips. The benefits can be especially significant in robotic welding applications, where regular contact tip changeovers can be greatly reduced.How Robotic Welding Supervisors Can Improve the Operation
How Robotic Welding Supervisors Can Improve the Operation
Find opportunities for improvement
Rely on available resources
• Poor joint configurations, or
• The need for tooling adjustmentsBest Practices for Robotic Welding Supervisors
Best Practices for Robotic Welding Supervisors

• High weld quality
• Cost saving
• Parts consistency
To maximize uptime in a robotic welding system, welding supervisors need to look beyond the administrative and operational duties often involved with this position and consider the actual components in the system. Maintenance personnel can often help.
Keeping an accurate, detailed log of all activities in a robotic welding cell can help welding supervisors maintain control over changes that could impact performance of the robotic welding system. Information to document includes:
• Parts that have been cleaned
• Consumable changes
• Drive roll tension adjustments
• Installation of a new welding wire drumThis article is the first in a two-part series focused on key information welding supervisors should know to help ensure robotic welding success. Read article two, How Robotic Welding Supervisors Can Improve the Operation.
Understanding Fixed Automatic Welding Guns
Understanding Fixed Automatic Welding Guns
About fixed automation welding
2. Large parts with very long welds or several similar welds
3. Large parts that would be difficult to weld manuallyAvoiding pitfalls in the process

Looking at the choices

Additional considerations
5 Misconceptions About Robotic Welding Guns and Consumables
5 Misconceptions About Robotic Welding Guns and Consumables
This article has been published as a web-exclusive on thefabricator.com. To read the entire story, please click here.
Reduce Downtime and Costs with Water-Cooled Robotic MIG Guns
Reduce Downtime and Costs with Water-Cooled Robotic MIG Guns
Understanding water-cooled robotic MIG guns
When to switch to a water-cooled robotic MIG gun
2. Excessive gun temperature (overheating)
3. Excessive cycle time (high duty cycle)Converting to a water-cooled robotic MIG gun
Maintenance and usage tips
Lower operating costs
Maintaining TCP: How Does Your Robotic MIG Gun Neck Factor In?
Maintaining TCP – How Does Your Robotic MIG Gun Neck Factor In?
The value of TCP
Air-cooled or water-cooled gun?
Getting the best performance
Optimize the system to ensure proper TCP
What to Know About Liners for Robotic Welding Guns
What to Know About Liners for Robotic Welding Guns
This article has been published as a web-exclusive on thefabricator.com. To read the entire story, please click here.
Choose the Right Power Cable to Reduce Downtime in Robotic Welding Applications
Choose the Right Power Cable to Reduce Downtime in Robotic Welding Applications
Conventional vs. through-arm guns

Choosing the right cable length
Key best practices
Reduce downtime with the right choice
Conventional Guns on Through-Arm Robotic Welding Systems: When to Make the Choice
Conventional Guns on Through-Arm Robotic Welding Systems: When to Make the Choice
Considerations in choosing robotic guns
Benefits of conventional guns
When to stay with a through-arm gun
Best practices for performance
Six Tips for Implementing Your Robotic GMAW Gun… and Getting the Most From It
Six Tips for Implementing Your Robotic GMAW Gun … and Getting the Most From It
Tip No. 1: Choose a solid mount instead of a clutch
Tip No. 2: Use an air blast feature
Tip No. 3: Utilize a simulation program
Tip No. 4: Utilize a neck inspection fixture
Tip No. 5: Ensure proper gun and cable installation
Tip No. 6: Conduct proper gun maintenance
gun to ensure they are tight and secure. Doing so
helps prevent issues that can lead to weld defect
and downtime.
Choosing and properly installing the right gun and cable is just the beginning. Proper ongoing maintenance is also an important factor to optimize performance. Optimize the system
Through-Arm Robotic MIG Guns: Top 10 Things to Consider
Through-Arm Robotic MIG Guns: Top 10 Things to Consider
1) Look for a gun that offers good power cable rotation.
2) Look for power cables constructed of durable components and materials.
3) Select the proper amperage of gun.
4) Identify whether the robot has collision software.
5) Consult the manufacturer’s instructions when installing a through-arm robotic MIG gun.
6) Be sure the power cable position is correct and avoid making it too taut.

7) Always install the stud into the front housing before bolting the front end onto the robot wrist.
8) Position the wire feeder close enough to the power cable that it will not be unnecessarily stretched.
9) Regularly conduct preventive maintenance and check for clean, secure connections.
10) Visually inspect consumables and the gun on a regular basis for signs of spatter.
Optimizing the Robotic Welding Process with the Right GMAW Gun
Optimizing the Robotic Welding Process with the Right GMAW Gun
Making the right choice

Choosing proper components
Maintaining tool center point
Adding to welding performance
Robotic GMAW gun maintenance

![]()
![]()