
Selecting, Installing and Maintaining a Through-Arm Robotic MIG Gun
robotic MIG gun, it is important to
carefully select and maintain the gun,
and also to follow the manufacturer’s
instructions for installation.
Robotic welding systems are all about speed and repeatability. When implemented properly, they can help companies gain greater productivity and higher weld quality, while also lowering their costs and, in some cases, providing them with a competitive edge.
As with any welding equipment, robotic welding systems have undergone improvements in technology that build on those advantages. For instance, in recent years, the industry has begun to shift from conventional robots with over-the-arm robotic MIG guns to through-arm robots. These robots feature robotic MIG guns whose cable assembly, as the name suggests, runs through the arm of the robot. One significant advantage to this style of robotic MIG gun is its durability. Because the arm of the robot protects the power cable, the cable is less prone to wear from routine torsion, and it is protected from catching on fixturing or rubbing against the robot — all situations that can lead to premature failure.
Because they don’t require a mounting arm like conventional robotic MIG guns do, through-arm robotic MIG guns also provide a smaller work envelope. As a result, they are particularly well suited for applications that require access to tight spaces. The automotive industry, for example, often uses through-arm robots.
Just like any piece of welding equipment, however, through-arm robotic MIG guns require careful selection and maintenance. They also require a few precautions during the installation process.
Selection
Choosing a through-arm robotic MIG gun is much the same as choosing a conventional robotic MIG gun, with the exception of the power cable selection. These power cables are typically sold in predetermined lengths according to the make and model of the robot, as opposed to the varying cable lengths available for over-the-arm robots. Having set lengths helps minimize kinking of the cable within the arm of the robot and also helps simplify installation of the MIG gun. Always know your robot make and model when placing an order for a new gun.
When choosing a style of through-arm robotic MIG gun, look for one that offers good power cable rotation. For example, some manufacturers place a rotating power connection on the front of the cable that allows it to be rotated 360 degrees. This ability to rotate freely provides stress relief for the cable and power pin, and allows for greater maneuverability for a wider range of applications. It also helps prevent kinking that could lead to poor wire feeding, conductivity issues or premature wear or failure. Also, look for power cables constructed of durable components and materials to help prevent similar wear or failure.
It is also important to select the proper amperage of gun and be certain that it has the proper duty cycle for the given application. Most manufacturers offer guns up to 500 amps, in both air- and water-cooled models.
Finally, identify whether the robot has collision software or if the robotic MIG gun needs to be paired with a clutch to protect it in the event of a collision.
Installation
Installing a through-arm robotic MIG gun incorrectly can lead to a host of problems, not the least of which is cable failure. Incorrect installation can also cause weld quality issues, such as porosity due to poor electrical connections; premature consumable failure caused by poor conductivity and/or burnbacks; and potentially, failure of the entire robotic MIG gun.
To prevent such problems, it is imperative to consult the manufacturer’s instructions for each specific MIG gun. For through-arm robotic MIG guns, it is also important to note that the power cable needs to be installed in a slightly different manner than a conventional over-the-arm robotic MIG gun. Consider these guidelines.

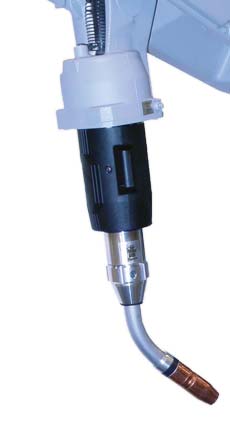
When installing a through-arm robotic MIG gun, allow approximately
1.5 inches of slack to prevent undue stress on the power cable
and power pin, and minimize the opportunity for damage
to either component.
First, position the robot with the wrist and top axis at 180 degrees, parallel to each other. Install the insulating disc and spacer the same as with a conventional over-the-arm robotic MIG gun. Be certain that the power cable position is also correct. The cable should have the proper “lie” with the robot’s top axis at 180 degrees. It’s important to avoid a very taut power cable, as it can cause undue stress on the power pin. It can also cause damage to the cable once the welding current passes through it. For that reason, it’s important to make sure the power cable has approximately 1.5 inches of slack when installing it. (See Figure 1).
Secondly, the stud on the front of the power cable needs to be fully inserted into the front connector of the through-arm robotic MIG gun. To achieve this result, always install the stud into the front housing prior to bolting the front end onto the robot wrist. By pulling the cable through the wrist and making the connections in front of the gun, it’s easy to slide the whole assembly back (once the cable is fastened) and bolt it onto the wrist. This extra step will ensure the cable is seated and will allow for maximum continuity and maximum power cable life.
Also, be certain to position the wire feeder in close enough proximity that the power cable will not be stretched unnecessarily after installation. Having a wire feeder that is too far away for the length of the power cable can cause undue stress on the cable and front end components.
Maintenance
Consistent preventive maintenance is key to the longevity of any robotic MIG gun, including the through-arm style. During routine pauses in production, check for clean, secure connections between the MIG gun neck, the diffuser or retaining heads and the contact tip. Also, check that the nozzle is secure and any seals around it are in good condition. Having tight connections from the neck through the contact tip helps ensure a solid electrical flow throughout the gun and minimizes heat build-up that could cause premature failure, poor arc stability, quality issues and/or rework.
Check regularly that the welding cable leads are secured properly and assess the condition of the welding cable on the robotic MIG gun. Look for signs of wear, including small cracks or tears, and replace as necessary.
Spatter build-up can cause excessive heat in the consumables and MIG guns, and block shielding gas flow. Visually inspect consumables and the gun on a regular basis for signs of spatter. Clean the gun as needed and replace consumables as necessary. Adding a nozzle cleaning station (also called a reamer or spatter cleaner) to the weld cell can also help. Like its name implies, a nozzle cleaning station removes spatter (and other debris) that builds up in the nozzle and diffuser. Using this equipment in conjunction with a sprayer that applies an anti-spatter compound can further protect against spatter accumulation on the consumables and the through-arm robotic MIG gun.