How To Install the Filter/Regulator Unit to the TOUGH GUN TT3 Reamer
The following images and instructions detail the installation of the Filter/Regulator unit onto a TOUGH GUN® TT3 reamer:
- Remove the Filter/Regulator from the box.
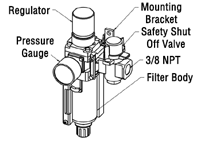
- Ensure that all the required parts are present (see Figure 1):
- Filter Body
- Regulator
- Pressure Gauge
- Mounting Bracket
- Safety Shut Off Valve
- Visually inspect for any cracks or defects in all the parts.
- Install air fitting (not included) onto each end of the Filter/Regulator unit. The fittings are all connected to the Filter/Regulator unit with 3/8 NPT threads.
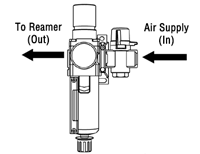
- The Filter/Regulator unit is directionally dependent and the air supply must come into the unit from the Safety Shut Off Valve side (see Figure 2). If the air supply is attached to the Regulator side of the unit, damage to the unit may occur.
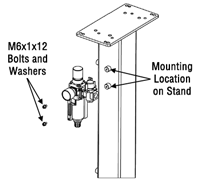
- The Filter/Regulator unit is designed to fit onto the TOUGH GUN Reamer Stand using two M6x1x12 bolts with washers. Insert the bolts and washers through the Mounting Bracket and attach to the TOUGH GUN Reamer Stand (see Figure 3 for the mounting location on the stand).
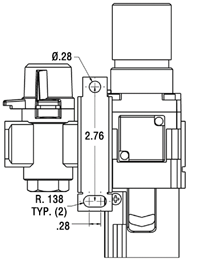
- The bolt pattern for the Filter/Regulator unit’s Mounting Bracket can be seen in Figure 4, in the event that the TOUGH GUN Reamer Stand is not used to secure the Filter/Regulator unit.
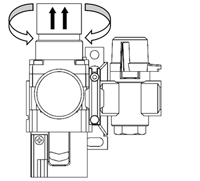
Connect and turn on the air supply to the Filter/Regulator unit. To adjust the Regulator, slide the top adjustment knob up and rotate the knob in the desired direction so that the pressure reading on the gauge meets the required pressure (80-100 psi at 16 CFM) for the TOUGH GUN Reamer (see Figure 5).
