
How To Install or Replace a Conventional MIG Welding Liner
NOTE: For MIG guns equipped with ‘Direct Plug-Ins’, Bernard®, or Euro connector, the procedure is the same. On Miller® style guns, the liner is held captive by a guide cap which must be removed and replaced when changing the liner.
Step 1:
NOTE: Ensure the power supply is off and the gun is removed from the feeder before proceeding.
- Remove the nozzle, contact tip and gas diffuser.
- If the power pin uses a liner set screw, loosen the set screw using a 5/64 inch Allen wrench.
- If the power pin is a thread-in liner type, using a 10-mm wrench, turn the thread-in liner collet counterclockwise until the liner is free from the power pin.
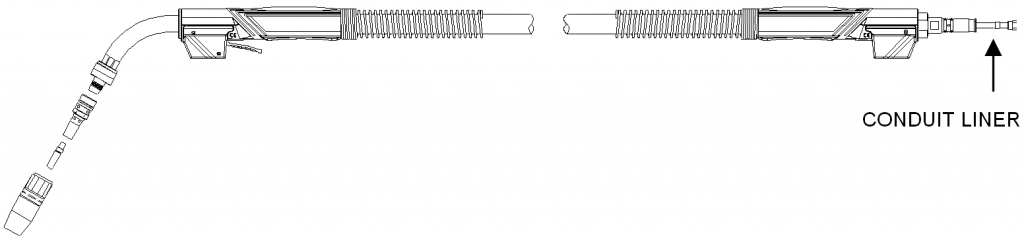
- With the gun straightened, grip the conduit liner with pliers and remove.
Step 2:

- Feed the replacement liner through the gun using short strokes to avoid kinking. Twist the liner clockwise if necessary.
- If the power pin uses a liner set screw:
- Seat the liner retainer with o-ring to shoulder inside the bore of the power pin.
- Secure by tightening the liner set screw. Do no overtighten.
- If the power pin is the thread-in type:
- Using a 10-mm wrench, turn thread-in liner collet in a clockwise direction and tighten in the power pin.
Step 3:

- Push the liner back into the gun and hold in place.
- Using the Liner Gauge, trim the conduit liner with a 3/4″ (20 mm) stick out.
- NOTE: When using 154 or 454-1 retaining heads, trim the conduit liner with a 1/2″ (13 mm) stick out.
- Remove any burr that may obstruct wire feed, especially on flat wire type conduit liner.
- Replace the nozzle, contact tip and gas diffuser onto the neck.