How To Install or Remove Wire Brake on a TOUGH GUN G2 Series Robotic MIG Gun
Important Note: This product is factory set for wire equal to or smaller than 0.045”. If you are using wire 0.052” and larger, please remove and replace the wire guide within the neck housing and replace it with the larger size (part #598G2-116) that is supplied in the product box.
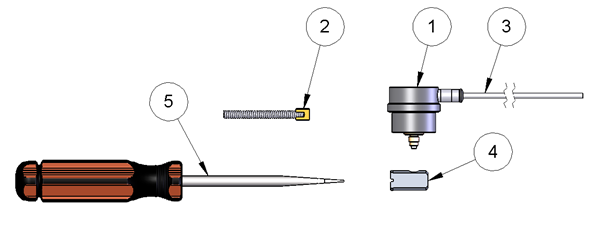
Wire Brake Kit

| Item | Part Number | Description |
|---|---|---|
| 1 | 599 | Pushing Unit |
| 2 | 495-18-35 | Jump Liner for ≤ 0.045″ |
| 495-18-116 | Jump Liner for ≥ 0.052″ | |
| 3 | 499-9-15 | Air Line 15′ |
| 4 | 598G2 | Wire guide for ≤ 0.045″ |
| 598G2-116 | Wire guide for ≥ 0.052″ | |
| 5 | Not Included | Flat Blade Screwdriver |
Removal and Installation Instructions
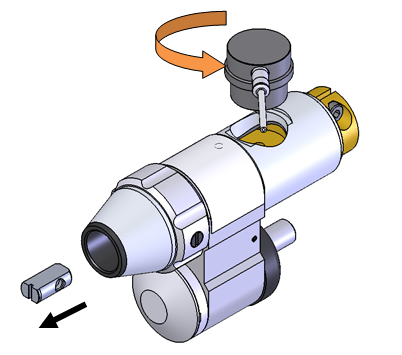
Step 1
Un-thread the pushing unit (1) and remove the wire guide (4). Note: Photo of gun housing is not exactly as shown.

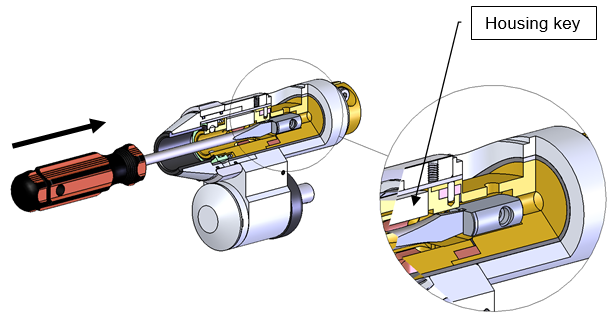
Step 2

Using the Flat Screwdriver (5), insert the wire guide (4) (flats parallel with housing key) into position within the housing.

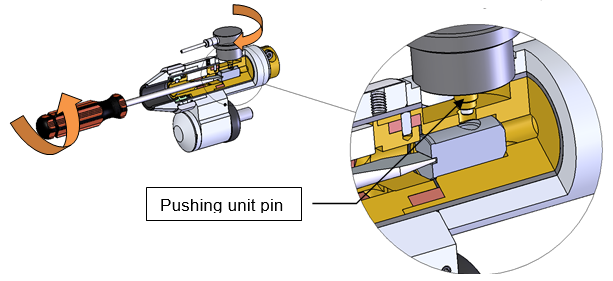
Rotate wire guide (4) to align hole with Pushing unit pin (1), thread-in the pushing unit (1). Note: Photo of gun housing is not exactly as shown.
Important Note: For the Wire Brake to work properly, make sure the pushing unit bottoms-out in the housing/connector.
INS070 09/2010


